Hello Crafty Friends - Annie here with a long post for 3 cards.
However, these cards came together rather quickly because I used the cut a part sheet from the Echo Park Coffee Collection that is part of the
Barista Blend Kit. Now, This kit is sold out - but, Kay does have the
Echo Park Coffee Collection 6 x 6 Pad available in the shop.
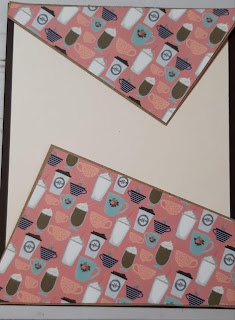
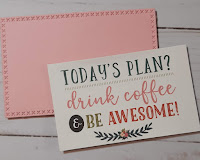
Card # 1 - Today's Plan? Dink Coffee & Be Awesome! - quick and easy.
I gathered the supplies - I trimmed my card front panels. Coffee for the base and Cream for the top layer. Next, I trimmed the pattern coffee paper so I had the corners of the paper. I trimmed a layer of kraft cardstock to mat the pattern paper. I die cut pink cardstock for a mat for the sentiment which is one of the cut a parts. Along with some embellishments.
Then, I adhered the Cream layer to the Coffee panel, Next, I adhered the pattern paper to the kraft mats. Then, I adhered the pattern paper layer to the card front panel.
Next, I adhered the sentiment to the pink cardstock. Then, onto the card front panel. Finally, I added a few embellishments. A small coffee cup paper clip and a few of the Doodles Paper Playground Sparkle Blends: Caffeinated. I adhere my card front panel to my card base.
Now, the card is complete!
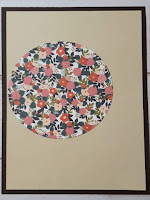
Card # 2 - Coffee - a few more layers.
I gathered the supplies - I trimmed my card front panels. Coffee for the base and Tan for the top layer. Next, I die cut a circle from the floral pattern paper. I trimmed a strip of the pink X pattern paper. I cut a rectangle piece of medium brown cardstock to mat the sentiment which is one of the cut a parts.
Along with some embellishments.
Then, I adhered the Tan layer to the Coffee panel.
Next, I adhered the floral pattern paper circle to the card front panel.
Then, I trimmed the washi tape in half and placed onto the card front panel.
** Tip: I stick my washi tape onto the backing that you remove from tape or foam squares
so I can trim it or punch shapes from it.
Next, I place the washi tape onto the card front panel about the distance of my pattern paper strip. I then adhered my pattern paper strip. Then. I adhered the sentiment onto brown cardstock and popped it up on foam square for dimension.
Then, I added a few embellishments to the card front panel. I used one of the pink Mulberry Hearts from the kit and a few sequins for the Doodles Paper Playground Sparkle Blends: Caffeinated. I added a bit of low profile foam adhesive to the Mulberry Heart.
I adhered the card front panel to my card base and my card is complete!
Card # 3 - You're As Sweet as CowfeAu Lait. The most layers and steps.
I gathered the supplies - I trimmed my card front panels. Black cards stock for the base and Tan for the top layer. Next, I die cut a circle from the Mulberry paper and a Flower shape from the pink paper. I trimmed strips of the pink & red check pattern paper, the Floral pattern paper and the black and white coffee cup pattern paper. I die cut the Floral pattern paper with a border Scalloped die.
I trimmed a rectangle piece of black cardstock to mat the coffee bean pattern paper & the sentiment.
I stamped the image and the sentiment. I colored the image with Prisma color pencils. I then trimmed my image into a circle.
Along with some embellishments.
Then, I adhered the Tan layer to the black panel.
Next, I adhered the strips pattern papers to the card front panel. Slightly overlapping them.
Then, I matted the coffee bean pattern paper onto the black cardstock and adhered it onto the card front panel.
Next, I inked the edge of the image circle with a bit of Distress Oxide ink: Vintage Photo.
Then, I adhered the flower die cut shape onto the card front panel and then the mulberry paper circle. Next, I added a bit of foam tape to the back of the cow image and placed it just to the right of the mulberry paper.
Next, I Trimmed the Mulberry Heart a bit because I felt they were too large for the space. I went old school here and just folded the hearts in half then cut a heart shape.
I will save the outer heart section for another project.
Then, I adhered the hearts on top of one another. Using a bit of foam adhesive on the top one. I added a sequin from the Doodles Paper Playground Sparkle Blends: Caffeinated mix.
Finally, I added the sentiment onto a piece of black cardstock and fishtailed the end. Popped it up with some foam tape and added it onto the card front panel. I adhered the card front panel onto the card base and my card is complete!
Materials Used:
Doodles Paper Playground Sparkle Blends: Caffeinated,
& Doodlebug Cute Clips: Coffee Shop)
Now, This kit is only available in the subscription.
However, Kay does carry quite a bit of the items ala cart in the shop.
Other:
Prisma Color Pencils
Black, White, Tan & Cream Cardstock from my stash.
Thank you for stopping by the blog today!
if you create a project with our Sparkle Blends.
All of our Sparkle Blends can be purchased on the
be sure to use the discount code
Annie 10(there's a space between my name and the number).


 .
. 


