Tuesday, July 30, 2019

Chipboard Cards with Guest Designer Karen


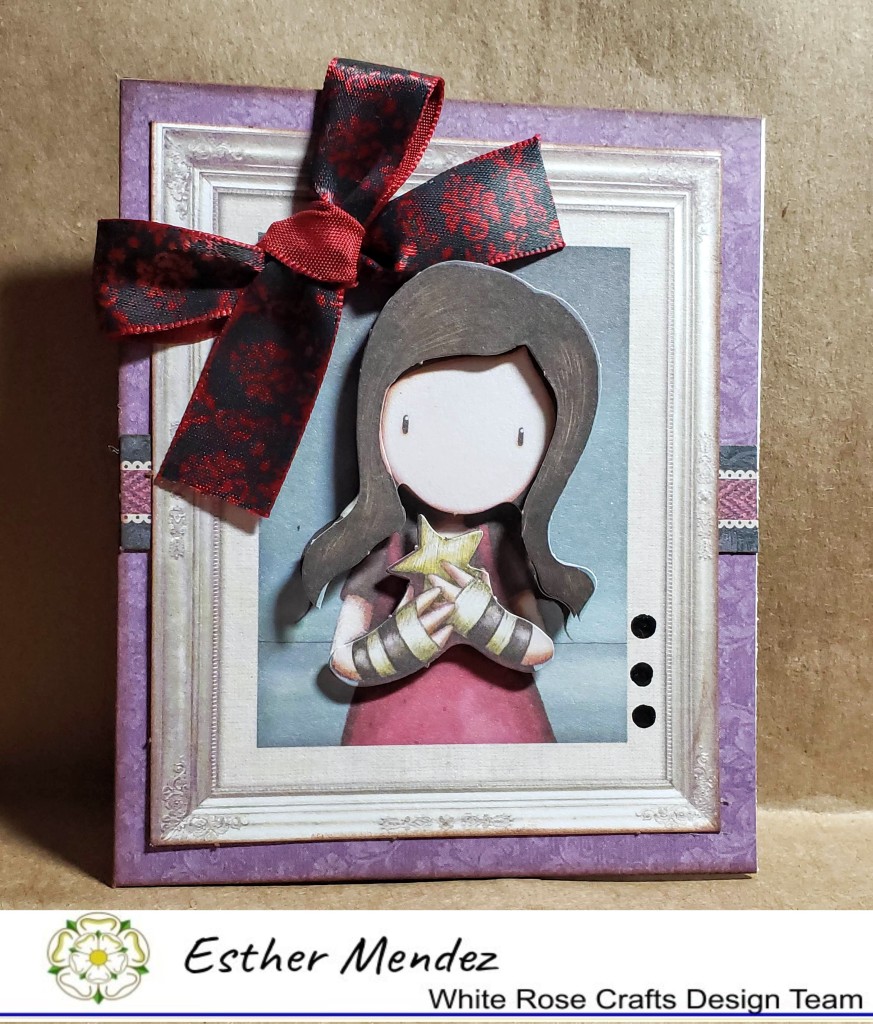
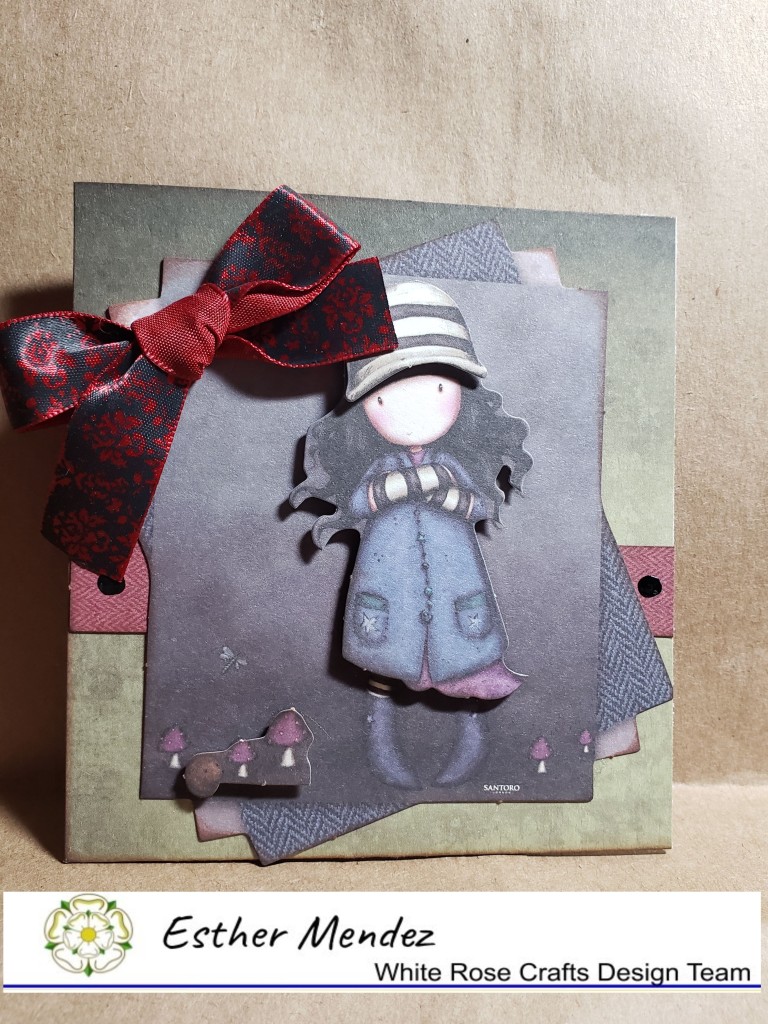
Hey everyone!   It is Guest Designer Karen again with my final guest designing post.  It has been so much fun coming up with so many different projects for WRC and I can't wait to share my final one with you.


Chipboard die cuts provide a strong focal point for a card.  They are so intricately cut and are a very versatile product.  


I love the texture and detail it gives a project.  

First, I began by selecting the background papers and then chose coordinating paint and ink.  If you color your chipboard first and then search your stash for paper that matches, you will often end up frustrated.  


I colored the heart chipboard with ink and painted the other but they can easily be colored with many different mediums. 


All the cards needed were a few pretty flowers and jewel embellishments.  I chose to leave the cards without a sentiment so that I can use them for any last minute need that arises.  You can browse all the beautiful chipboard designs...HERE.  


TIPS: Ways to decorate unfinished craft chipboard
  1. ink
  2. rubber stamp a pattern
  3. embossing powder & heat gun
  4. acrylic paint
  5. crackle paint
  6. spray mists
  7. mica powder
  8. glitter glue
  9. patterned paper

Epoxy Embellishment (House of Roses)

Dragonfly Brad Embellishments

Other Supplies:
silver acrylic paint
paint brush
blue spray mist
rose gold metallic ink pad
copper brads
card base 6x6"

Don't forget there is still time to join the Sketch Challenge ending on July 31st and you just might just win a $15 WRC e-gift card. Pop on over to our to the Facebook Gallery and share what you are creating with us.  Create a card, a scrapbook layout, a tag, mix media project, or even a piece of altered art. Just show us how us how you were inspired by the sketch. All the guidelines to participate can be found HERE.

Thanks for visiting!  Happy Crafting!

If you would like to see more of Karen's creative projects, visit her blog Art& Soul.


Thursday, July 25, 2019

Gorjuss Gift Card Holders - Santoro

Welcome to the last post of my Gorjuss Series. Today I'm sharing some Gift Card Holders I made with the Santoro Gorjuss Tweed Craft Card Compendium - Makes 24 Cards . This kit is jammed packed with pretty die-cuts, card bases, and it also has ribbon. I have made so many projects with this kit, it's definitely worth every penny!
Isn't it Beautiful! 

For these gift card holders I used card bases (included in Kit) and cut the down to fit the die cuts. They will be different size gift cards as the die cuts are different sizes.

I made a super quick video tutorial on how to glue the card base to make the gift card pocket:


Every die cut sheet has two girls and layers to make the girls 3D with some pop dots! They really end up looking nice.

These are just some of the girls included. I used pop dots to add dimension.

I used the card bases to the size of the die cut and glued two edges together, this creates a pocket. The opening is at the top and you can slide in a sentiment and gift card. These make fun gifts, they are unexpected but so fun. I use regular 4.25 x 5.5 envelopes for these, they fit great!


The die cuts are so pretty and full of detail that not much is needed to finish up the Gift Card Holders. A bit of ribbon which is sold separate from the kit. Too Easy! I would like to see what you create so make sure to share at the WRC Gallery.


Supplies used:
SANTORO GORJUSS TWEED CRAFT CARD COMPENDIUM -

SANTORO'S GORJUSS TWEED RIBBON 6/PKG
SANTORO'S GORJUSS TWEED SMALL WOODEN FRAMES 16/PKG


Below are some additional project I’ve made with the beautiful Gorjuss Santoro collection.


Fun Fold Cards 
Simply Amazing
Especially for You
Sassy Scrapbook page


Thank you for stopping by!


Gorjuss by Santoro Stamps: https://whiterosecraftsllc.com/t/gorjuss-by-santoro


Kit Subscription:
https://whiterosecraftsllc.com/t/limited-edition-subscription-kits


Sparkle Blend: https://whiterosecraftsllc.com/products?keywords=Sparkle+blends

Wednesday, July 24, 2019

You're Fin-tastic! with Guest Designer Adam


Hello Fellow Card Makers,
Adam here, sharing a fun card using the White Rose Crafts challenge theme of “water”. I find working with a challenge theme is fun and causes me to push myself to come up with new ideas.
All my supplies can be found on the White Rose Crafts site.

Supplies: Lawn Fawn – Manatee-rific Stamp Set
                Your Next Stamp – Fishy Fun
                Tim Holtz Oxides – Tumbled Glass, Peacock Feathers, Salty Ocean
                Masking tape/paper
                Nuvo Crystal Drops – Silver Moon Dust
                Ranger Super Fine Embossing Powder- White


Starting with a layer one piece of white cardstock, I blended the three Oxide inks in a masked oval. I then flicked water drops onto the blended ink creating water texture.

I then stamped the manatees and sea vegetation in Memento black ink from the Lawn Fawn Manatee-rific stamp set. All of these pieces were cut out and colored using ink markers.

I cut a banner from a piece of blue cardstock to match the card base. I scored the banner to allow for folding the banner and give it dimension. I embossed the sentiment from the or folding the banner and give it dimension. I embossed the sentiment from the Your Next Stamp set – Fishy Fun in Ranger Super Fine Embossing powder – white. I then folded the ends to form the banner and attached it to the card layer below the blended oval.
I attached the manatees to the edges of the oval and the sea plants and sand to the center bottom of the oval. The final step was to add Nuvo crystal drops in silver moon dust to the water to create bubble like spots.

I hope you are happily creating water themed cards along with us at White Rose Crafts. I want to thank White Rose Crafts for allowing me to share my creations with you on their site. I have enjoyed being a guest designer these past two months. I hope you have enjoyed my cards. You can see more of my creations at Instagram.com/ARK513

Tuesday, July 23, 2019

Remember this Moment with Guest Designer Karen


Welcome White Rose Crafters,
It's Guest Designer Karen here to share a layout using a fabulous paper pad from Craft O'Clock called Always Together.  At first glance, it may appear that this set is romantic in nature and is most likely meant for wedding photos but you can clearly see how perfectly they worked with this simple family portrait.  The wood grain brought me feelings of a warm cozy home and the flowers in shades of maroon perfectly complimented the colors in the photo.  Follow along and I'll tell you all my secrets to creating this simple layout!

Directions:

1. Matte photos with coordinating cardstock. Adhere them in a diagonal row onto the background paper.


\
2. Paint the chipboard frame with gold acrylic paint. When thoroughly dry, apply white crackle paint over the gold paint.  Set aside to dry.

3. Adhere the chipboard frame over the central photo being careful to frame your subjects.  

4. Die cut numerous pieces of weeping willow branch with different shades of green cardstock.  Add layers of weeping willow branches under the bottom edge of the photos and secure.

5. Embellish the chipboard frame with two rose clusters. Add an epoxy embellishment and a pearl branch to add texture to the layout.  Keep the clusters compact in order to not cover too much of the elegant chipboard with the roses.  I really wanted the chipboard frame to feature prominently and for the crackle texture to be obvious.

6.  Cut various lengths of vine trim 1-3" and intermingle the vine trim behind the roses and around the chipboard frame. 

7.  Finally, stamp an coordinating sentiment in the lower right corner of the layout using black ink.


TIP:  Use the smallest amount of double sided adhesive that will still hold the item in place.  Attach items to your layout gently so that if you change your mind you may be able to reposition or remove it without causing damage to the layout.  You can always add more adhesive or use liquid adhesive at the end when you are satisfied with your creation.


Supplies:
Always Together Scrapbook Paper Pack 12x12" (Craft O'Clock)

Pearl Branch Embellishment (Martha Stewart)
  

Remember This Moment Stamp - Kaisercraft Mini Clear Cling Stamp

Other Supplies:
3 photos (4x6")
gold acrylic paint
paint brush
white crackle paint
cardstock (green & brown)
black ink pad

Don't forget there is still time to join the Sketch Challenge ending on July 31st and you just might just win a $15 WRC e-gift card. Pop on over to our to the Facebook Gallery and share what you are creating with us.  Create a card, a scrapbook layout, a tag, mix media project, or even a piece of altered art. Just show us how us how you were inspired by the sketch. All the guidelines to participate can be found HERE.

Thanks for visiting!  Happy Crafting!

If you would like to see more of Karen's amazing projects, visit her blog Art& Soul.