
Hello Crafty Friends - Annie here with a fun card using embossing folders and an adorable mermaid stamp from Wild Rose Stamps.
If you haven't seen Design Team Member Alison's FB Live Embossapoolza Part 1 - You really need to check it out.
Now, In keeping with her tutorials - I created this card.
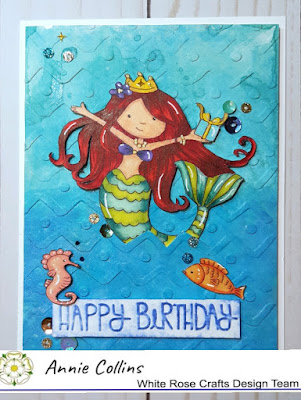
As always - I start by stamping and coloring my images. I fussy cut them and colored the edges with the Memento marker. Then set them side. Next, I trim all my card pieces and grab two embossing folders.

I started by dying an A2 Card front panel of white cardstock using Distress Oxide in Broken China. I did the direct to the paper method and then sprayed some water that has a bit of perfect pearls mixed in. I heat set it.


Once the cardstock panel was dry I used the embossing folder. I then added some Distress Oxide in Mermaid Lagoon and some Distress Oxide in Blueprint Sketch watering them down with the perfect pearls mix for some shimmer.


Next, I embossed the sentiment and did the direct to paper technique with Distress Oxide Blueprint Sketchand did again a spray with the perfect pearls water mix.


Now, for assembling the card. I gathered all the card components and start by using the precision knife to cut into one of the waves so that I could tuck the mermaid. Then, I added some foam adhesive to the mermaid and placed her onto the card front panel. Next, I added foam adhesive to all of the card front panel and adhered it to the card base. I then adhered the sentiment and seahorse with some foam adhesive and I adhered the fish directly to the card front panel.


Finally, I added a few sequins from Doodles Paper Playground and the card is complete!

Materials Used:
Memento Pen - Tuxedo Black
*(Please note that I used two folders from my stash.
However, White Rose Crafts LLC carries a variety of embossing folders)
Sakura Gelly Roll Pens -Metallic Gold, Black & White
Recollections Brand Heavy Weight White Cardstock
Copic Markers: R59, BV17, BG72, BG09, G21, B00, & B01
Spectrum Noir Markers: CR10, DR1, HB1, CT4, GY4,
BT3, CG1, CG2 MG1, CRI, & BO1,
Thank you for stopping by the blog today - I hope you found some inspiration!
if you create a project with products or kits purchased on the
No comments:
Post a Comment
We at White Rose welcome your comments and questions, but please keep them clean and kind! Thanks!