Monday, April 29, 2019

April Sketch Challenge Winner

Thank you to everyone who entered the White Rose Crafts April Sketch Challenge! We received some really fantastic project entries--so I'm really glad winners are picked randomly so I don't have to decide!

Image result for winner

Speaking of winners (smooth, right? 😜), our April Sketch challenge winner is Lisa Reynolds Bzibziak! 

Congratulations Lisa! You have won a $15.00 e-gift card to White Rose Crafts! We will be in touch shortly, via PM, with your Gift Code!

✨✨✨✨✨✨✨✨✨✨✨✨


Do you want to join the fun? Make sure you join our Monthly Sketch Challenge in the White Rose Crafts Gallery group on Facebook! 

  • A new challenge will be posted in the Gallery on the 1st of every month. 
  • Please feature something sold on the WRC store site in your project. Not sure if you have something? Take a look at the Store, you may be surprised what you already have in your stash!
  • Please upload your project image here to this album to be included in the challenge. 
  • Feel free to add your blog url if you are posting your project at your page as well. We'd love to read more about your project.

Rules: You must be at least 13 to enter. Open internationally. All entries must be received no later than 11:59pm EST on the 26th of each month. One winner will be chosen at random from all entries to receive a $15.00 e-gift card to White Rose Crafts and will be contacted via PM. Winner will have 72 hours to claim their prize, or a new winner will be chosen. This giveaway is in no way sponsored, endorsed or affiliated with Facebook, Blogger or any of their entities. All prizes are furnished by White Rose Crafts

Friday, April 26, 2019

Amber's Take on the Barista Blend Kit

Hello Rosies! Amber here, taking over the blog again today with 2 fun cards I created with the May Barista Blend Kit! This is my favorite WRC kit so far, and I'm certainly not alone since this kit has already sold out as a stand alone kit! WOW! Its really no wonder, this kit is PACKED with amazing products to make tons of really fun cards that I can't wait to send to my friends! If you would like to snatch up one of the THREE remaining kits in the world--you can join our subscription plan! You will receive the next 3 month's kits, (including this one, while they last), with free shipping, for $74.99. That's a savings of nearly $35.00! WOW Again!

Even though the individual kits have sold out, I still want to share some inspiration for those who managed to snatch theirs up (it begins shipping May 1st), and will have some more cards to share in the coming weeks using the kit with some of the add-ons that will be available at 10% off (effective May 1st), to help you extend your kit Even Further--so keep an eye out for those!

☕☕☕☕☕☕☕☕☕☕☕☕☕

I knew I needed to incorporate some of the gorgeous ivory, mulberry lace paper in the kit, this time, so I started with the 5 1/4 inch square, white card base (included) and trimmed a panel of American Crafts Coffee brown card stock (a 12x12 sheet is also included) to 5 inches square, mounting it on the card base with Kaisercraft 1/4 inch double sided tape. I selected a sheet of latte art patterned paper from the Echo Park Coffee Paper Pack (12 sheets included), and cut it to 3 x 4 7/8 inches. Next I cut a piece of the mulberry lace paper to 2 1/4 x 4 7/8 inches. I adhered the mulberry lace paper to the brown cardstock panel with Imagine Crafts On Point Glue. I applied double sided tape to the back of the patterned paper and adhered it to the panel so it overlapped the mulberry lace paper. To hide the seam, I used a scrap of brown cardstock from my scrap box.


Next I chose the barista girl sticker from the included Echo Park 12x12 Coffee sticker sheet (matching the paper). I cut a 1 1/2 x 3 inch piece of white cardstock and added the sticker to that, intentionally letting her hang over the edges a little bit. Next I cut a 1 7/8 x 3 3/8 inch piece of the coffee bean patterned paper on the other side of the latte art print and mounted my sticker panel to that. I grabbed the sentiment sticker "Today's Plan? Drink coffee & be awesome!" that looks a bit like a speech bubble to me, and adhered it above the sticker panel on the right side, so it looks like the barista might be saying it to the recipient.


I knew I wanted to keep the embellishments a little bit simple, since the patterns on the card are bold and a bit busy, so I chose one of the large cream colored mulberry hearts and one of the smaller pink hearts included in the kit. I also added 3 sequins from the Exclusive Caffeinated Sparkle Blend, included from Doodles Paper Playground in the top left corner and added some of the super pretty Caramel Cream Nuvo Drops to the center of the sequins, as well as in a triangle formation of 3 dot clusters over on the right side of the card. for a final touch, I used the Nuvo drops to draw a dimensional heart on top of the pink mulberry paper  heart.


On the inside, I added a 3 x 3 1/8 inch panel of the same coffee bean pattern from the front of the card, and another of the stickers from the Echo Park Coffee sheet that says "Coffee makes everything possible". For some flat embellishment, I also added a few of the latte art stickers from the sticker sheet as well, to further tie it together with the card front design.


☕☕☕☕☕☕☕☕☕☕☕☕☕


For my second card, I absolutely had to use the adorable little Jillibean Soup Cocoa/Coffee Mug PVC Shaker and matching die cut card, included in the kit (I told you guys this one was JAM PACKED!) These are great because they're a standard A2 size card, (4 1/4 x 5 1/2 inches) which is the size I prefer to work with. I started by pulling out that gorgeous Papermania Geometric Mocha Washi Tape from the kit, adding two diagonal stripes in the top left and bottom right corners. 


Next, I cut a piece of the American Crafts Coffee cardstock (included) to 4 1/8 x 5 3/8 inches and adhered it to the inside right panel of the card using Washi Tape, to hold it in place where I wanted it. Then I closed the card and chose  a sentiment sticker from the Echo Park Coffee sticker sheet. and placed it where I wanted it, inside the die cut opening, directly onto the brown cardstock. I opened the card again and placed the PVC shaker pouch inside, and added a moderate amount of the Caffeinated Sparkle Blend (Exclusive to kit) on the sticker, on the opposite panel, before removing the adhesive from the PVC pouch and closing the card once again, making sure to press down on all edges to seal it well. Next, I added some double sided tape to the same side of the brown panel that the shaker is on and closed the card one more time, to adhere the whole panel to the inside cover of the card. 


I fussy cut the coffee cup sticker from the Echo Park sticker sheet, leaving a small white border, and adhered it to the bottom left of the card. I decided I wanted something in the top right, for balance, and added the coffee bean heart sticker. For a final, cute touch, I used the Caramel Cream Nuvo Drops to draw steam coming off the coffee mug shaker.


I really kept the inside of this card simple, adding two parallel, vertical strips of the Washi tape and two sentiment stickers from the included sheet.


☕☕☕☕☕☕☕☕☕☕☕☕☕


If you managed to get your hands on one of these fabulous kits, I hope today's cards have inspired you to really get creative with the contents! 

If you weren't one of the lucky fans to nab a Barista Blend kit, you are able to purchase some of the contents from White Rose Crafts, individually. I'll link those products below--as well as some great substitute, or alternative products, in case anyone wants to build their own mini kits!

Included in Kit:
Echo Park Coffee Paper Pack
Caramel Cream Nuvo Drops
Jillibean Soup Cocoa/Coffee Mug PVC Shaker Pouch 6pk
Jillibean Soup Cocoa/Coffee Mug Shaker Card 6pk
American Crafts Chestnut A2 Card Base 12pk

Suggested Alternative/Add-On Products:
Couture Creations Enchanted Tea Party Paper Pack
Little Acres Creations Cafe Dreamers Stamp Set
Your Next Stamp Sprinkles Coffee & Tea Stamp Set
Doodles Paper Playground Cafe Au Lait Sparkle Blend
Doodles Paper Playground Gingerbread Man Sparkle Blend
Doodles Paper Playground Breakfast At Tiffy's Sparkle Blend
Kaisercraft  Tea Party Mini Wood Veneers
Craft Creations Brown Plaid 12x12 Cardstock
Mulberry Paper Brandy
Mulberry Paper Sand
Elegant Metal Heart Embellishment 4pk
Keisercraft Love Hearts Mini Wood Veneers
Laser Cut Chipboard Hearts Embellishment 11pk
Martha Stewart Glittering Heart Stickers
Martha Stewart Doily Lace Hearts Embossed Stickers
Trimcraft Tiny Tatty Teddy Laser Cut Hearts & Flowers 16pk
American Craft Chocolate w/ White Polka Dots Ribbon
Tim Holtz Distress Ink Mini Ink Kit 3 - Neutrals
Tim Holtz Distress Ink Mini Ink Kit 6 - Coffee/Donut Shop
Chocolate Fondue Glitter Nuvo Drops
Nuvo Chocolate Chip Vintage Drops


☕☕☕☕☕☕☕☕☕☕☕☕☕


Thank you for stopping by!
Come back soon,
Happy Crafting!


Thursday, April 25, 2019

May "Barista Blends" Five Fast Cards Part II


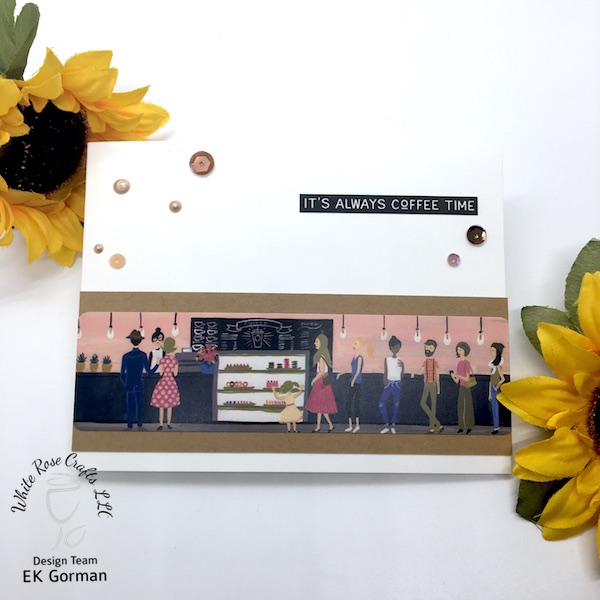
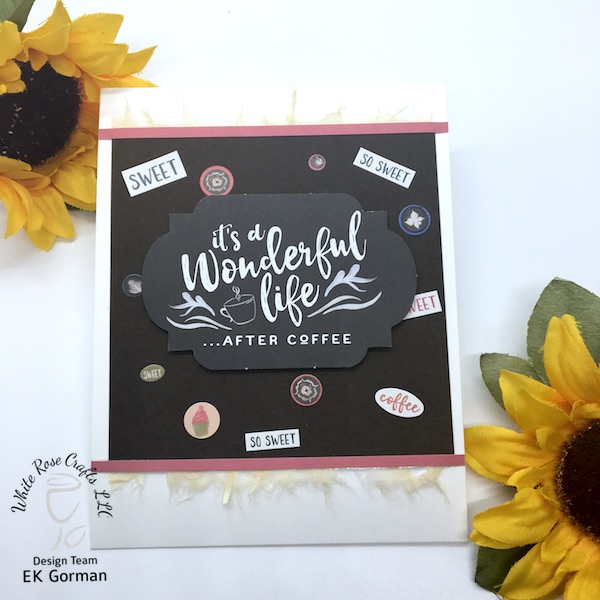
Hey everyone.  It's EK from ekgorman designs and it is time for the second part of my three part series where I create Five Fast Cards using the May "Barista Blend" Subscription Kit from White Rose Crafts.

As this goes to print, there is literally one kit left to preorder individually, so if you want it, don't wait.

If you missed either of the earlier videos about this month's Subscription Kit, click below to to catch up.

And if you want to watch today's video in HD, click here:


For more details on each of the cards, scroll down.


Card One
EK Gorman White Rose Craft May 5FC Part 2 a
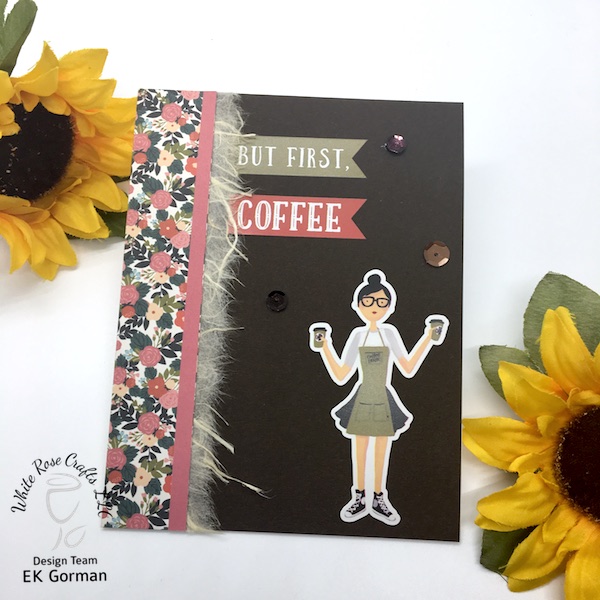
The first card features one of the printed papers, a bit of the Mulberry Lace, three stickers and some of the Sparkle Blend Sequins.


Card Two
EK Gorman White Rose Craft May 5FC Part 2 c

April
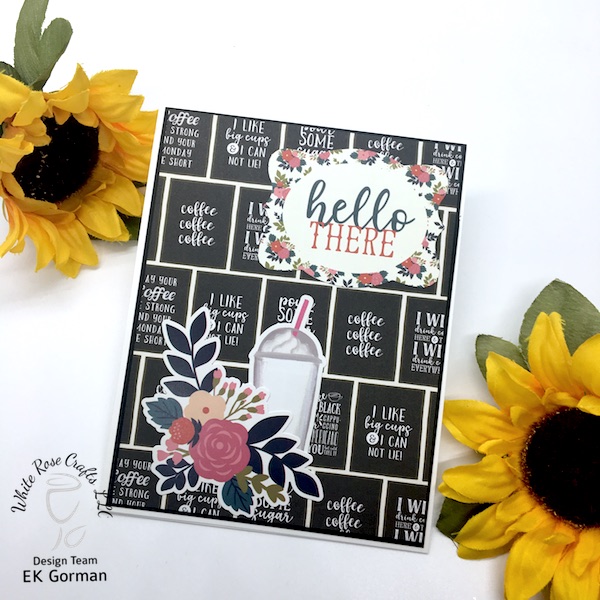
For card two, I tried to create one last sketch submission for this month's Sketch Challenge over on the WRC Facebook Page.  I used two printed papers, a piece of ephemera, and the doodlebug stickers.


Card Three
EK Gorman White Rose Craft May 5FC Part 2 b
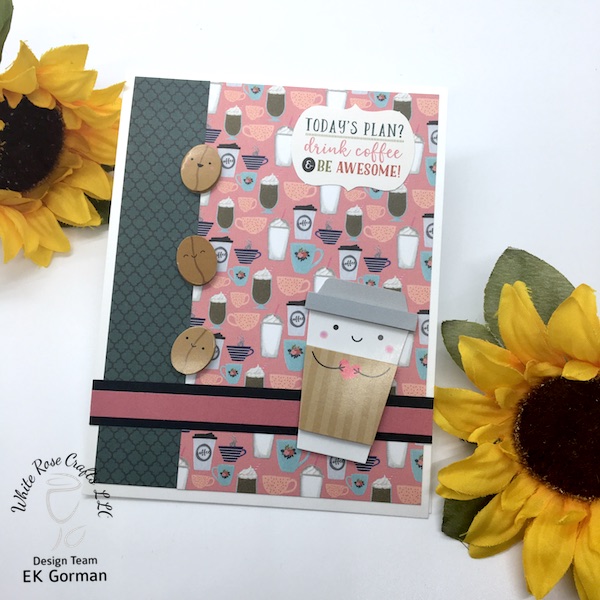
For this card I used one of the printed papers, two stickers, and a piece of ephemera.


Card Four
EK Gorman White Rose Craft May 5FC Part 2 d
My horizontal card four features two stickers, nuvo drops and sparkle blend sequins.


Card Five
EK Gorman White Rose Craft May 5FC Part 2 e
Card five uses some of the cardstock trimmed up, strips of a piece of paper, a piece of ephemera, and all the rest of my tiny stickers.

There is also a bonus card this week, but you have to watch the video to check out the extra card I made using one of the card frames, a piece of paper, two sticks, some stamping from the included stamp set, nuvo drops, and sequins.

Let me know in the comments below which card today is your favorite.  Until then, happy crafting.

Embossing with Creative Medium

Hello! Alison here. Ever since I was an Artist in Residence with Imagine, I really enjoyed working with Creative Medium. It's thick, smooth, easy to work with, dries quickly, and comes in some really fantastic colors. To this day I love using this paste, and I am always happy with the results. I bring this up because this week, the White Rose Crafts team is sharing projects that have embossing. Embossing comes in many forms, heat, dry, wet....so you are sure to see a myriad of projects. But I chose to focus on "wet," so with Purple Iridescent Creative Medium as my embossing paste.
White Rose Crafts recently got in some fabulous new stencils from Kaisercraft. Big, 12" x 12" stencils that have 4 different designs on it. I actually plan on cutting mine down into 4 smaller stencils, so that they are easier to manage. The stencil I used is called Grunge, and it is right up my alley. I taped the stencil down to a Distress Oxide background I made a month ago, and applied the paste with a palette knife in a messy, inconsistent way. I didn't want that stenciling to look perfect, especially since my Distress Oxide background was so "messy."
The dried Creative Medium maintains a lovely milky finish, but with flashes of iridescence, depending on the color you choose. I love seeing the purple flash here and there on this card. I dried the paste with my heat gun to speed up the process, and because it causes the Creative Medium to bubble and pop, creating a fantastic texture. To top off the card, I added one of the Greenhouse Die Cuts from Kaisercraft, plus a sentiment from the Greenhouse Paper Pad.
For some additional sparkle, I added a few sequins from the Springtime Sparkle Blend. The colors in that Blend worked perfectly with the colors on the rest of the card. I adhered them with On Point Glue from Imagine. I love that this card may look like it took a lot of time, but it didn't. I didn't need to color, or fussy cut anything, and since my background was made previously, that made the whole process quicker too. What kinds of things do you do to help your creative process move a little faster? Please be sure to check out the rest of the WRC Team to see what kind of embossing they're doing this week. And then head over to the White Rose Crafts LLC shop to see what's new in store. Thanks for stopping by. Have an inspiring day! 

Wednesday, April 24, 2019

Crafting with Guest Designer Annie

Hello Crafty Friends - Guest Designer Annie here with another card created with the March Blue Skies Kit. This Kit is so full and I can keep creating cards for another month.


I keep this one pretty simple. Some die cutting and a bit of Tim Holtz Distress Spray for a splash of fun.

Let's get started!

I gathered all the materials I would be using for this card. All but a few things are from the kit. The Distress Spray, the White Tiny Flowers, and Specialty paper are from the Add-on section of the shop. From my stash I am using Spellbinders: Card Creator Dies and Lawn Fawn: Spring Sprig Dies.

First, I did all the die cutting. I used 3 of the Spellbinder card creator dies(#, #2 & #3) to create 2 little frames. I die cut the Gold Specialty paper from the kit.

Next, I used the Lawn Fawn Spring Sprig dies to die cut the sprig from Green Specialty paper and the little flower for die cut from 2x of the creamy Specialty from the add-on section.

Then, I trimmed my sentiment and a few extra strips from the pattern paper that is included in the kit. I then used a bit of the Scrapberry ink included in the kit to add some color to the edges of the strips.

Next, On the Blue card base included in the kit - I did some brush strokes and splatter from Distress Spray in Spiced Marmalade and I then add a bit of Mermaid Lagoon Distress Spray splatter.

Once the background was dry I am ready to create the card. 
I gather all the components to the card.

I start with the little frames. I adhered one frame flat and the other with some foam tape for some dimension.


Next, in the little space that the two overlapped frames created, I build my cluster. I start with little sprigs then I added the little tiny white flowers (from the add-on section). I then added the pattern paper strips on foam tape. Finally, I added the tiny die cut flowers some are adhered directly and some are adhered with foam tape. 


Next, I add the finishing touch with the sequin Butterfly and some of the Doodles Paper Playground Sparkle Blend Sunny Skies from the kit. I start with the butterfly - I add some foam adhesive to the body and wings. Place it just under the sentiment. Then, I add some liquid glue to the center of the butterfly and added 3 of the Gold curly Q's from the Doodles Paper Playground Sparkle Blend Sunny Skies. Cleaned up any extra glue.  


I also added a 5 small Glitter sparkles from the  Doodles Paper Playground Sparkle Blend Sunny Skies toward to left bottom and top right of the frames.


Now, the card is complete. I will add and piece of white cardstock inside for writing my message.
Supplies Used for Both Cards:
Gold Specialty Paper, Kaiser Craft Pattern Paper,
Blue Cardstock Card Base, Scrapberry Ink &
Doodle Paper Playground Sparkle Blends: Sunny Skies

With so many beautiful stamps, papers, 
Specialty papers & Inks in the shop 
I know you are bound to create something wonderful!

Thank you for stopping by the blog today!

If you would like to join in the fun for the White Rose Crafts April's Sketch Challenge and other fun activities and conversations make sure you join the White Rose Crafts Gallery group on Facebook!

Tuesday, April 23, 2019

Mixed Media Artist Trading Coins by Kim


Good morning friends, Kim here with my next DT project for White Rose Crafts.
This week the team is featuring some embossing techniques using lots of amazing items from the WRC Store.
I have created my first Artist Trading Coins using the Abstract & Geometric ATC's. These coin bases are made out of laser cut chipboard and are super fun to alter!


I wanted the background to be fairly neutral, so I am using, believe it or not, some Christmas paper. The Craft Creations paper Christmas Scrolls gave me the neutral base I was looking for, but also had a small touch of gold that I thought would suit the coins.


I placed my coins on the paper and drew circles around them and then cut out the paper for the back of the coin.


I gave the coins a coat of gesso, as a primer to have them ready to use my embossing powder.  I used a clear embossing ink on the coins and sprinkled my powder on top. I used two different colours from my stash to give the coins the mottled look you see below.


On this first one, I added a fun key embellishment from Melissa Francis from the WRC store. I used a Tim Holtz sentiment from the small talk set from my stash on each of the coins.


For this one, I used some of the laser cut  wooden gears from the WRC Store and added a little bit of bling to the centres of them.


The next one has an embossed wooden arrow with a little butterfly charm on it.


And, finally I think this one might be my favorite, a little wooden heart with bling and the words, just breathe.  All the coins have some Dovecraft glitter glue in Crystal on them, its my favorite and I use it on everything!


I hope you like my project today and have found some inspiration here!
Thanks for stopping by.
Please visit my blog Angeldreamcrafts for more information on me and my projects.

White Rose Crafts Products Used