

White Rose Crafts LLC is a Virginia based, online craft shop. On the blog, you will find Design Team projects, announcements, exclusive deals, new product releases & shop related news.
Thursday, December 31, 2020
Sunday, December 27, 2020
Find Joy in the Journey - Graphic 45
Welcome Back! Today I'm sharing another Girl Scout layout. "Find Joy in the Journey" a Cookie prize layout. I used my goodies from White Rose Crafts to create this layout. Graphic 45 - Kaleidoscope collection is simply BEAUTIFUL! I mean it! the colors are just wonderful.

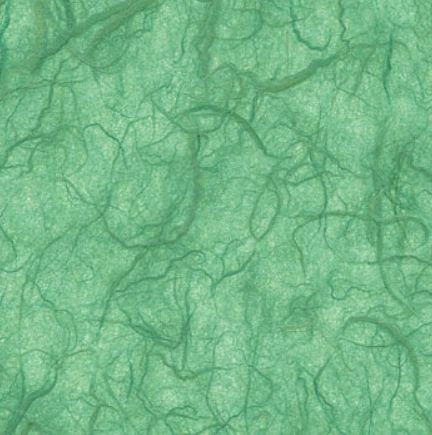
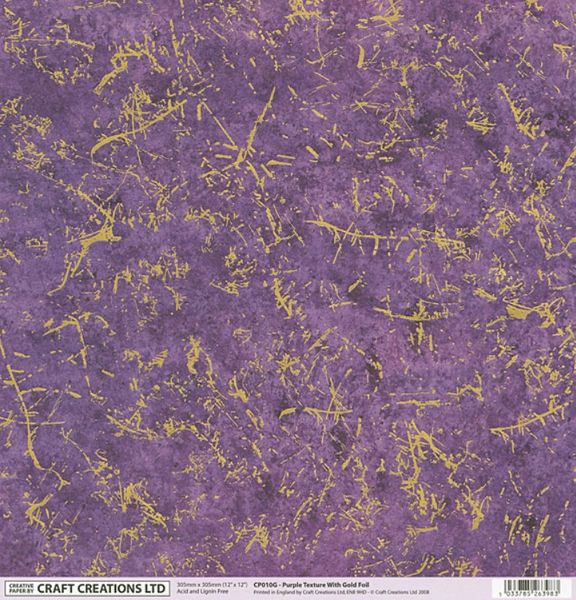
I also incorporated Mulberry and Foiled paper both of which White Rose Crafts carries! They are so fun to incorporate into projects to add texture and dimension to layouts.
Mulberry Paper

Craft Creations Paper with Foil

Here are some layout closeups:


If you missed my blog post on Creating Background go check it out, then you can buy the stamps at White Rose Crafts and use Code “Esther 15” to save 15%.
This is the mat that I made for the layout. This is what my backgrounds typically look like before all the goodies go on top.

I hope I have inspired you a tiny bit. Remember to share your beautiful creations at the White Rose Crafts Gallery. Thank you so much for stopping by!
Ready to Shop: White Rose Crafts Store
Friday, December 25, 2020
From Our Family To Yours
We want to take Just a moment and say
from our Family to Yours,
from our Family to Yours,
Merry Christmas!
We've pulled a few of our design teams best of best holiday projects to share with you today.

Anna-Marie


This may have been the strangest of years, but we are thankful for you being part of our family.
Thursday, December 24, 2020
Angels Descending

Well, there is just one more sleep till Christmas Day, so it seemed only fitting for my project today to feature an Angel who could and would watch over a new born king. I thought this angel from Woodware UK Angel Voices stamp set was perfect to watch over a sleeping child.

I started by stamping out the Angel Voices main image onto some white cardstock with Memento Dye Ink in Tuxedo Black.

I colored the images with Nuvo Creative Pens. I used a combination of Depth & Shadow, Fair Skin Tones, Hazy Mauves, Emerald Seas, Rich Reds, and Pebble Beach. I then fussy cut out the image.

To construct the card frame, I pulled a collection of papers from the Wild Rose Studio Antique Library paper pack. I then trimmed them up to different sizes. Adhere the papers to an A2 card frame.

I then stamped a sentiment from the Angel Voices stamp set onto the card frame in both brown and black ink.

I stamped background images onto the card frame using images from the Angel Voices stamp set in both black and brown ink.

Finally I added drops to the card frame from both Dovecraft Glitter Glue in Blossom and Nuvo Craft Drops in Antique Rose.

As we wait till the last sleep before Christmas, I wish upon you Peace & Love, blessing of healing, and of course a Merry Christmas.

What is your Christmas Wish this year? Let me know in the comments below. Until then, happy crafting!
Tuesday, December 22, 2020
Miss You
Hello! Alison here. Today I am sharing a project I made for the White Rose Crafts shop. I got to play with a bunch of fun things to create a mixed media card. Take a look.
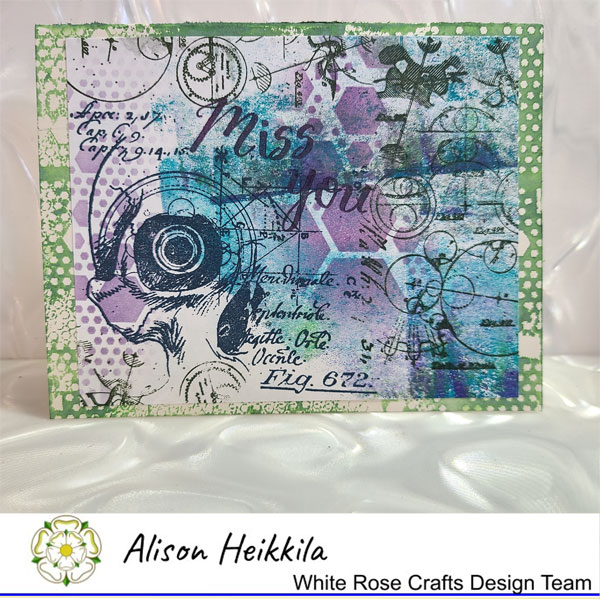
I really wanted to use some of the images in the Steampunk Alchemist stamp set from AALL & Create that I haven't really worked with yet. That skull image was at the top of my list. I've been going through a lot of my Gel Press monoprints lately to use some of them up (so that I can make more!), and I found one that I thought would work well. This one was a roll-off print that also picked up a bit of leftover paint from the Gel Press. I love the colors on it.
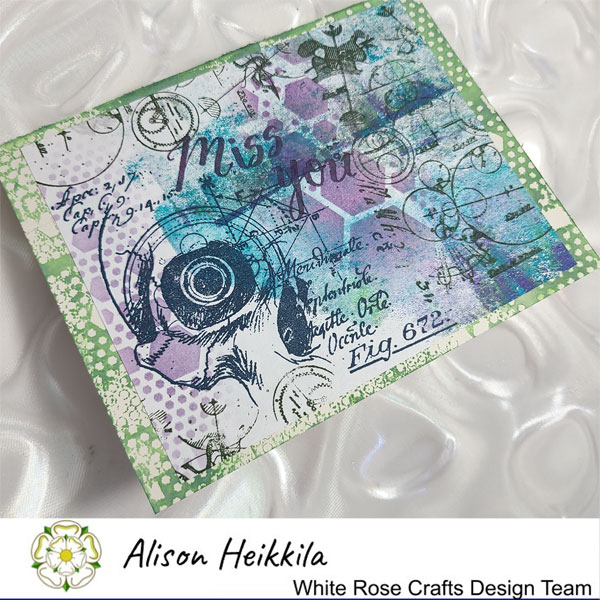
I stamped the skull with VersaFine Clair Ink in Twilight. Then I used regular VersaFine ink in Olympia Green to stamp the gears stamp a few times. I had a bit too much white space on the piece, so I broke out the Heapza Hexagonz stencil (I am crazy about hexagons!) and inked it with Dusty Concord Distress Ink. That filled in those areas nicely, so I moved on to my sentiment. I decided to use the Traceable Alphabet from Kelly Creates to make my sentiment, which I stamped with Imperial Purple VersaFine. My ivory card base was looking a little blah, so I grabbed the Heapza Hexagonz stencil again, and this time I inked the stencil directly with Mowed Lawn Distress Oxide, spritzed it with water, and applied it to my base, around the edges. I love this reverse effect.
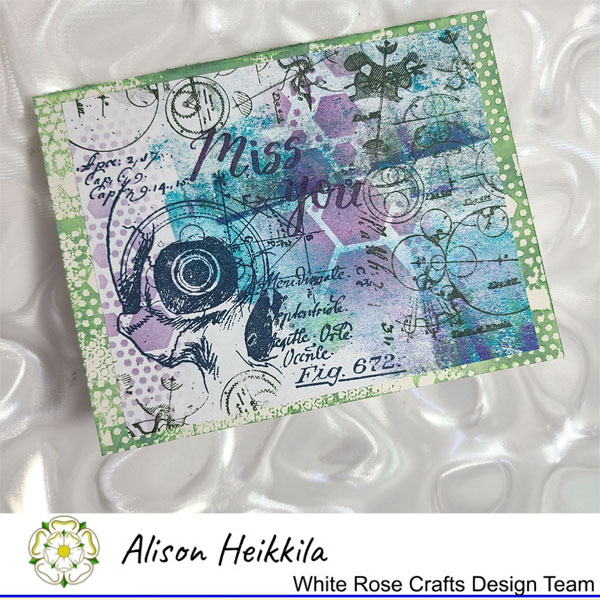
It's so easy to get a cool collage look when you combine stencils and stamps, especially the ones from AALL & Create. I love the vibe from them, and I am always happy with my results. And I think that using that pretty script font from Kelly Creates takes the "hardness" of the card down a notch. Please visit the White Rose Crafts shop to see the latest and greatest. And, hang out with us in the White Rose Crafts Gallery on FB! Thanks so much for stopping by. Have an inspiring day!
Sunday, December 20, 2020
Quick Holiday Tags

So I have realized I am seriously short gift tags this year, so I thought I would whip up a few quickly. I am just loving how the Woodware UK Cross Stitched Christmas stamp set from White Rose Crafts made creating these gift tags so quickly.
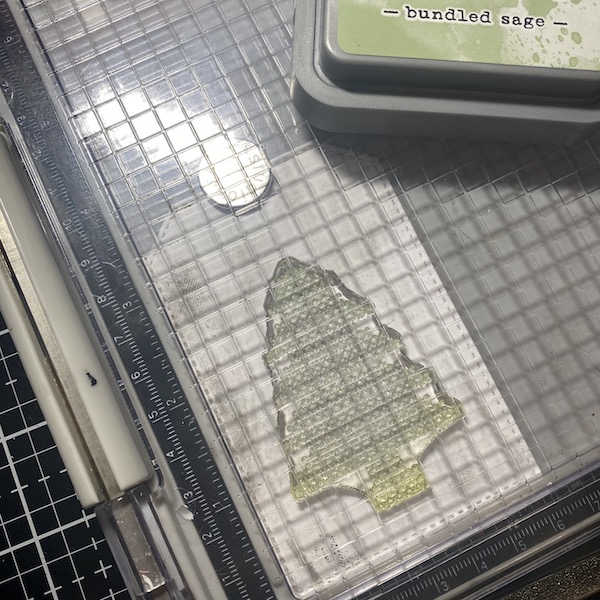
I started by pulling out four gift tags, and stamping each of the four images onto the tag using Distress Oxide. For the Tree I used Bundled Sage. The stocking got a dabbing of Stormy Sky. The heart was stamped with Abandoned Coral and for the reindeer I used Brushed Corduroy.

Then, using my stamping platform, I stamped the needle and thread and sentiment onto the tag using VersaFine Black Onyx. I did commit the crafting sin, and snipped the sentiment so I could put it on two lines. Totally worth it.

I hand stamped a heart button onto each tag using Aged Mahogany.

I added a trimmed piece of gold ribbon from the Scrapberry "Seaside" Ribbon collection. I also added a bit of a shadow to each heart button using a black pen.


I love how simple these were to create but how cute they turned out. I also adore the fact that since I snipped the sentiment I can use the heart and 'sew happy' sentiment all year long for all my embroidery friends! Let me know in the comments below how you would use this sewing theme stamp set. Until then, Happy Crafting.
Sunday, December 13, 2020
Henry the Fox

Hey Rosies! Design team member, Anna-Marie W. Batz here using a variety of paper crafting supplies available at White Rose Crafts LLC online shop to bring us this cute creation.
Stamp sets used were from both Craft Consortium Henry Fox and Stampendous Laurel Burch Feline Blooms. They went so well with the Echo Park Fall is in the air 6 x 6 papers. Of course Henry the Fox needed a little paper heart that was die cut from the Aspire Petallics Mountain Rose card stock after being stamped with Memento Black Tuxedo Ink and colored with the Nuvo Creative Pen Collection in Fragrant Oranges. The card was then accented with twine and daises to complete the cuteness!!!
Why not check out the at wide variety of supplies that White Rose Crafts offers you to see what you can use in your Papercraft creations. Happy Creating!!!
Friday, December 11, 2020
Make a Wish
Greetings! Alison here. Today I am sharing a new project for the White Rose Crafts Shop using a number of products they carry. I have mentioned before that AALL & Create has become one of my all-time favorite stamp companies, so I decided to make a card using some of their items.
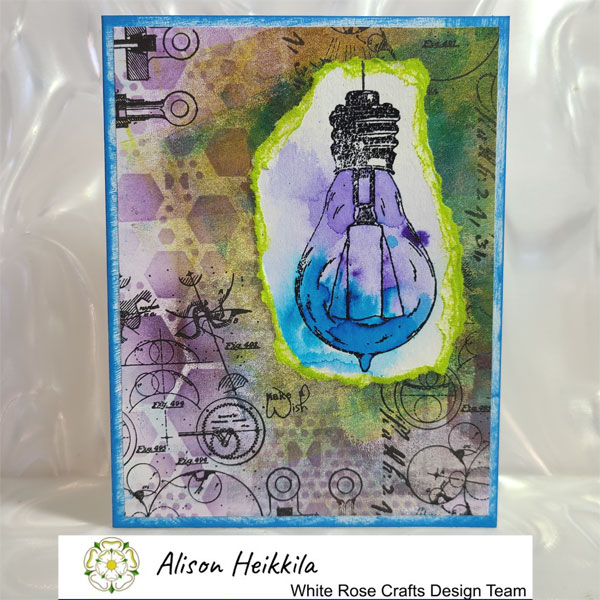
I am absolutely crazy about the 3 large light bulbs that are in the Steampunk Alchemist (#387) set. I have used them several times already, and I know that they will continue to be played with often. I really love coming up with different ways to color them. For this card, I went through my monoprints and found a roll-off print (simply a print that was made with the excess paint that was on my brayer) that had a nice range of colors and an area that looked like it was lit up. I trimmed it down to 4" x 5 1/4" and stenciled it with Dusty Concord Distress Ink and AALL & Create's Heapza Hexagonz (#112) stencil. On top of that, I stamped 2 of them smaller stamps that are in the Steampunk Alchemist stamp set around the edges in Onyx Black VersaFine Ink.
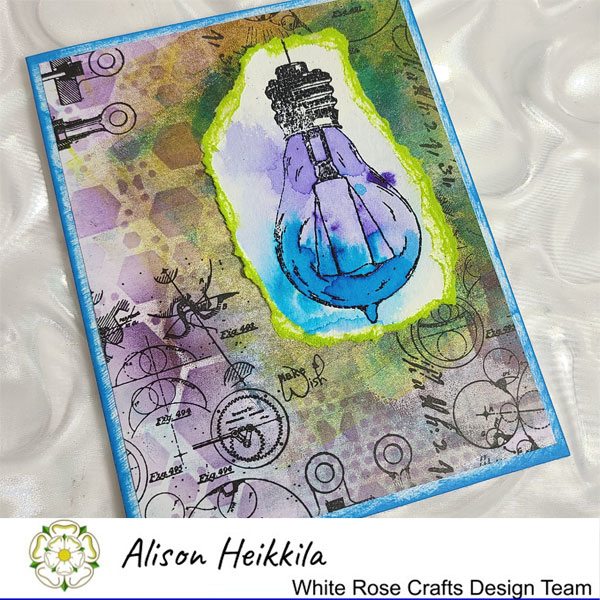
For the light bulb, I stamped it on to a piece of watercolor paper with VersaMark Ink and embossed it with a detail black powder. Then I sprinkled on a bit of lavender and turquoise Brusho crystals from Colourcraft, and spritzed them with water. These crystals activate with water and explode with color, so a little goes quite a long way. I helped move the color and dry the area a bit with my heat tool, being careful to not re-melt the embossing powder. When it was dry, I tore the edges and inked them with Twisted Citron Distress Oxide ink. I also inked my card base with Salty Ocean Distress Oxide ink, to make that turquoise Brusho pop. Last, I added the tine "Make a Wish" sentiment from the AALL & Create Poppies (#207) stamp set.
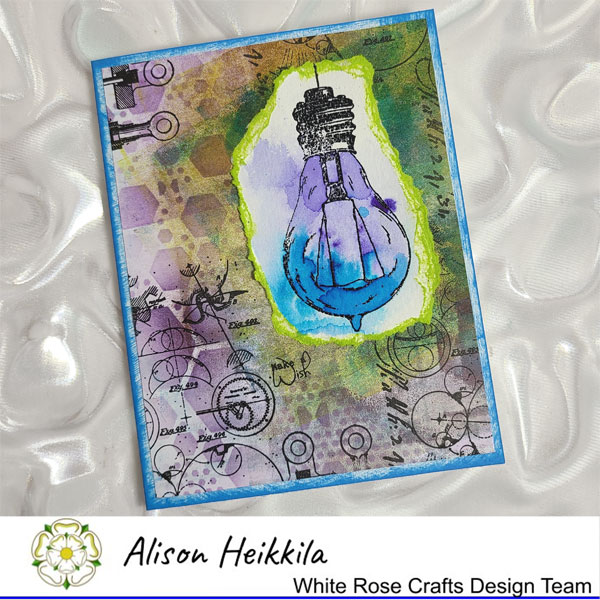
This is a great card for many occasions, in my opinion, and it's great for a masculine card. I love combining monoprints with stamps and stencils, though you could easily substitute the monoprint for patterned paper. White Rose Crafts has lots to choose from! Thanks so much for stopping by. Have an inspiring day!
Thursday, December 10, 2020
A Heartfelt Christmas

Hey Everyone! It's EK, and today I have a question for you. Do you have the same problem I do this time of year...? You want to make Christmas cards but you also have lots of Black Friday purchases that are not Christmas themed and want to play with those too. That was exactly where I was today as I sat down to make this card. So today I am playing with both everyday stencils and stamps and a Christmas stamp to create this fun card.

I started by building my background using both the AALL & Create Cracked Walls 1 and Cracked Walls 2 stencils from White Rose Crafts onto watercolor paper.

The first layer was colored in Fired Brick and the second layer in Aged Mahogany Distress Oxides. For this blending I used the Ranger Blending Tool.

I then stamped the AALL & Create Squeaky Friends stamp set onto some heavy cardstock. I colored in the image using the Nuvo Creative Pens in Stormy Greys. I then fussy cut out the image leaving a little of the floor for the squirrels to stand on.

I trimmed up the ink cardstock and added it to an A2 card frame. Then using the VersaFine Onyx Black ink, I stamp the Christmas Tree image from the Whimsical Christmas stamp set.

I adhered the squirrels onto the card frame and then decorated the trees with a series of Nuvo Drops. I used Autumn Red and Woodland Green for the ornaments. For the snow stars I used a little Sea Breeze and the large hearts and stars were accented with White Blizzard.

Finally, I added a sentiment to the top of the card using some Pine Needles Distress Oxides.

I hope you enjoyed seeing how I created this slightly different approach to a Christmas Card. I really think these squirrels now look like the were meant to be decorating the tree. I really can't wait to find out what other trouble I can get the Squeaky Friends into later. If you have any suggestions, make sure you add it to the comments below.

Until then, Happy Crafting!
Wednesday, December 9, 2020
Merry Christmas Cards featuring the A Merry Little Christmas Kit
Hello Crafty Friends - I am here with 2 cards using the A Merry Little Christmas Kit.
Card #1 - Merry Christmas

I gathered the supplies from the kit. I have the Decoupage paper, the specialty gold cardstock, the puffy Reindeer trim and the red and green pearl stickers. From my stash I have white card base, White, Green and Red cardstock and adhesive.

I start by inserting a piece of white cardstock into my Xyron Creative Station Lite. I will use this for the decoupage paper. I adhere the decoupage paper to the white cardstock it measured 4"x51/4".


Next I adhere a strip of green cardstock to the bottom of the card panel. It measures 1"x4". I then adhere the reindeer trim on the seam of the green cardstock. Next I die cut the Merry Christmas from the Gold specialty paper and adhere it below the reindeer in the center. I then adhere one of the red mini pearls to the nose of the first reindeer. Making him into Rudolph.


Now, the card is not complete!

Supplies Used:
Memory Box Die: Merry Christmas
Xyron Creative Station Lite
Recollections Brand 110# Cardstock: White
Recollections Brand 80# Cardstock: Green and Red
Card #2 Merry Christmas

I start by gathering my supplies. I stamped the Christmas tree 3 times onto white cardstock. I also trimmed the green cardstock a 1/4" smaller than my card base. I trimmed the pattern paper to 3" X 4".

I adhered the Green cardstock onto the card base.
Then, I adhered the pattern paper onto the green cardstock.
Next, I put a piece of Gold Glitter washi tape at the base of the pattern paper.


Next, I die cut the tree panel with the stitched rectangle.
I stamped the sentiment and fussy cut it out.
I foam mounted both the tree panel and sentiment to the card.

Finally, I added some Nuvo drops to the trees and snowflakes.

Now the card is complete!

Supplies Used:
Lawn Fawn Brand Die: Stitched Rectangles
Recollections Brand 110# Cardstock: White
Recollections Brand 80# Cardstock: Green and white
Recollections Brand Washi Tape: Gold Glitter
Thank you for stopping by the blog. I hope you found some inspiration!
Be sure to tag us White Rose Crafts LLC on social media
if you create a project with products or kits purchased on the
White Rose Crafts Design Team Member Annie Collins
Blog: https://littlewingscreates.blogspot.com/ IG: @anniec09
Subscribe to:
Posts (Atom)