Showing posts with label card making. Show all posts

Thursday, April 8, 2021

Swim

Hello! Alison Heikkila here. I have a new project for White Rose Crafts today, which uses a Gel Press print that I made during a FB Live (check it out HERE), plus Distress Oxide Inks and some AALL & Create items. I love making mixed media cards, and I am really happy with how it turned out.

I really wanted to use the seahorse from AALL & Create's Sea Life stamp set, which I also used in a post last week. You can check that out HERE. I pulled out a bunch of my monoprints and chose a 3" x 5" print that I thought worked well with the sea horse. It was made with acrylic paint from Golden and Deco Art Media, and has the Lotza Trianglez stencil and a brick stencil from Studio Light. The one I used is sold out now, but this one HERE is still available.

I decided that I would stamp the seahorse image twice. Once directly on the card, and once on another piece of cardstock so that I could cut it out and pop it up with foam. I stamped it both times with Twilight VersaFine Clair ink and clear heat embossed the one I cut out. I also inked that one with Shaded Lilac Distress Ink.

I wanted to integrate the print into the card base a bit better, so I added some Twisted Citron Distress Oxide to my work surface, spritzed it with water, and smooshed it on to my card (I had not yet added the popped up seahorse yet). I dried it with my heat tool and then I did the same thing again, but with Mowed Lawn Distress Oxide. These colors really pulled out the green from the monoprint nicely and tied everything together. I wanted a bit more texture, so I added Sea Breeze Jewel Drops by Nuvo, which is my favorite of all the Drops. I added droplets on various parts of the card as well as on my die cut sentiment. This color really looks like water to me.

When I have a gel printing session, I accumulate a lot of prints quickly, so I really try to use them on different projects so that I don't have too many to sift through. Using them on cards is a great way to get through the stack, especially if you have stamps that have a grungy or collage-like look to them. White Rose Crafts has lots of wonderful products that lend themselves perfectly to this style. And if it's not really your thing? They have plenty of other products that you're sure to love. And, hang out with us in the White Rose Crafts Gallery on FB! Thanks so much for stopping by. Have an inspiring day!

Tuesday, March 23, 2021

'Seriously Caffeinated' Five Fast Cards, Part III

Hey Friends. I am back with the third and final part to my three part series creating Five Fast Cards with White Rose Crafts 'Seriously Caffeinated' Cardmaking and Craft Kit. If you love coffee and cardmaking made simple, you will absolutely fall in love with this beautifully coordinated kit.

Make sure to hop on over to my video and let me know which of today's five fast cards.


Need to catch up in this series:

‘Seriously Caffeinated’ Unboxing Video

‘Seriously Caffeinated’ Five Fast Cards, Part I

'Seriously Caffeinated' Five Fast Cards, Part II

Make sure to let me know which card from today’s video is your favorite in the comments below. Until then happy crafting.

Sunday, March 7, 2021

Victoriana

Hey Friends! Trying something a little different today, using great paper to do all the work in a couple of cards! I pulled out the 13@rts Victoriana paper pack from White Rose Crafts.

CARD ONE

For my first card, I pulled out a piece of ASPIRE Petallics Autumn Hay cardstock. I trimmed it up to 4.25x5.5 inches. Then using some dies from my stash, I created a smaller square and an oval, from the inside of the trimmed cardstock, mainly because I didn't want to 'waste' paper. I also trimmed a strip of another piece.

I trimmed up two pieces of the Victoriana paper pack to fit just inside the petallics cardstock.

Using double sided adhesive, I layered the cardstock and the printed paper. I had to trim the cardstock oval down by hand to fit the paper the way I wanted, but loved how the haystack looked under the printed paper.

Using the Technique Tuesday You Did It stamp set to add a sentiment to the hand trimmed banner.

I finished the card with a few drops of Nuvo Crystal drops in Dark Walnut.

I love how this one came out, and how the Autumn Hay cardstock brings out the warm tones in both of the Victoriana papers.

CARD TWO

For card two I repeated similar steps, but used ASPIRE Petallics Wine Cup cardstock.

I pulled out two different papers from the Victoriana paper pack and trimmed three ephemera pieces from the paper pack.

I had planned to simply lay the banner trimmed paper over the dark red paper, but felt it got lost. So I pulled out a piece of Pearl card stock and trimmed it up and placed it under the banner.

I also ended up pulling up a third piece of printed paper from the pack, and laid it on top of the strip of paper.

I added the oval cardstock and the hand trimmed ephemeral to the card. The ephemera was added with three dimensional squares.

I added a sentiment from the Technique Tuesday You Did It stamp set and finished the card with some Nuvo Vintage Drops in Earl Grey.

I love how this one came out too, even though it is much more moody and dark.

Let me know which of the two is your favorite in the comments below. Until then, happy crafting.

Sunday, February 14, 2021

'Love Always' Cardmaking and Craft Kit


Hey Friends! Happy Valentine's Day!
It's EK and I figured it was only fitting to finish up my three part series today of all days using the 'Love Always' Cardmaking and Craft Mini-Kit from White Rose Crafts.

If you missed the unboxing or previous Five Fast Cards, I will include links below to help you catch up.

Unboxing
Five Fast Cards, Part I
Five Fast Cards, Part II

For today's video, if you want to check it out in HD, click here.


Make sure you let me know in the comments below which of today's cards is your favorite. Until then, happy crafting.

Wednesday, February 10, 2021

"Sweet Violet" Five Fast Cards, Part II

Hey Friends! I am back today with the second part of my three part series where I create five fast cards using the 'Sweet Violet' Cardmaking and Craft Kit.

If you missed the unboxing of this collection of international crafting supplies, click here.

If you missed the first part of this series, click here.

And don't forget to pop over today and share the love and let me know which of today's cards is your favorite.


Let me know in the comments below if you want to see any different techniques next week when I create my third and final part. Until then, happy crafting.

Wednesday, January 13, 2021

"My Guy" Five Fast Cards, Part II

Hey everyone, it's EK! I am back today with the second part of my multi-part series where I create five fast cards, using basically just the supplies found in the craft kit (minus card frames, tape and markers). I am playing with the "My Guy" Cardmaking kit from White Rose Crafts, and you just have to check out this collection.

Make sure you pop over and check out how easy it is to craft with this kid designed to make the perfect cards for your guy.


Let me know what your favorite card is in the comments below. Until then, happy crafting.

Thursday, December 24, 2020

Angels Descending

Well, there is just one more sleep till Christmas Day, so it seemed only fitting for my project today to feature an Angel who could and would watch over a new born king. I thought this angel from Woodware UK Angel Voices stamp set was perfect to watch over a sleeping child.

I started by stamping out the Angel Voices main image onto some white cardstock with Memento Dye Ink in Tuxedo Black.

I colored the images with Nuvo Creative Pens. I used a combination of Depth & Shadow, Fair Skin Tones, Hazy Mauves, Emerald Seas, Rich Reds, and Pebble Beach. I then fussy cut out the image.

To construct the card frame, I pulled a collection of papers from the Wild Rose Studio Antique Library paper pack. I then trimmed them up to different sizes. Adhere the papers to an A2 card frame.

I then stamped a sentiment from the Angel Voices stamp set onto the card frame in both brown and black ink.

I stamped background images onto the card frame using images from the Angel Voices stamp set in both black and brown ink.

Finally I added drops to the card frame from both Dovecraft Glitter Glue in Blossom and Nuvo Craft Drops in Antique Rose.

As we wait till the last sleep before Christmas, I wish upon you Peace & Love, blessing of healing, and of course a Merry Christmas.

What is your Christmas Wish this year? Let me know in the comments below. Until then, happy crafting!

Thursday, December 3, 2020

Vintage Wreath

This image has an empty alt attribute; its file name is img_e1810.jpg

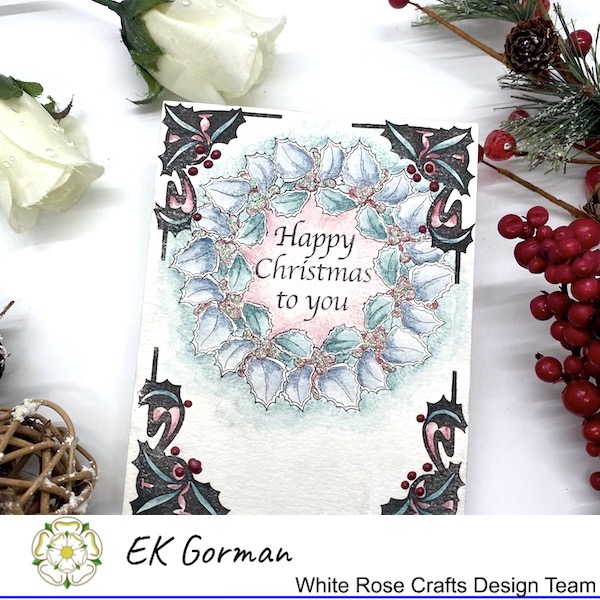
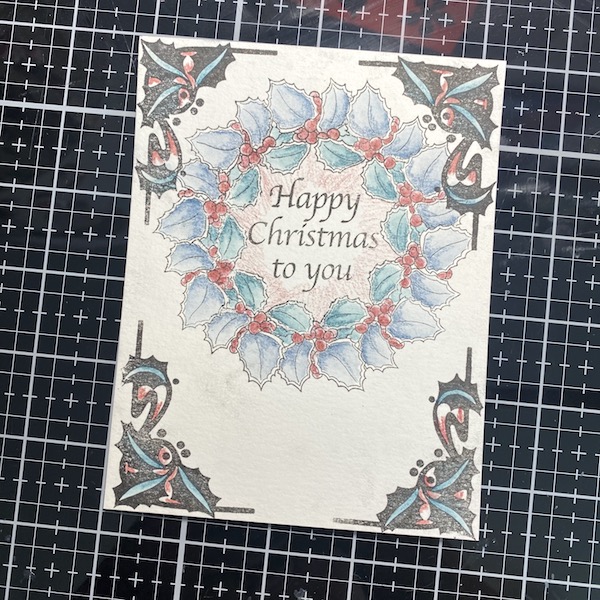
Hey Friends! It's EK and today I am playing around with a Woodware UK stamp set from White Rose Crafts today and some watercolor pencils to create a little vintage feel Christmas card.

This image has an empty alt attribute; its file name is img_e1784.jpg

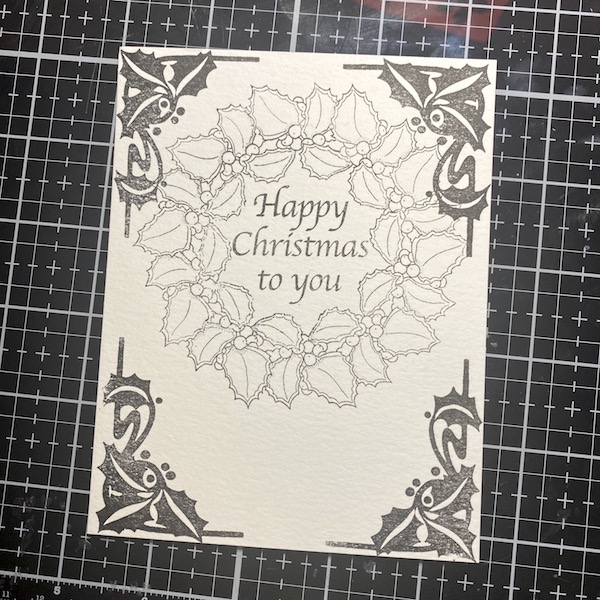
I started by stamping out the Woodware Holly Wreath stamp set onto some watercolor paper using some water resistant black ink.

This image has an empty alt attribute; its file name is img_e1785.jpg

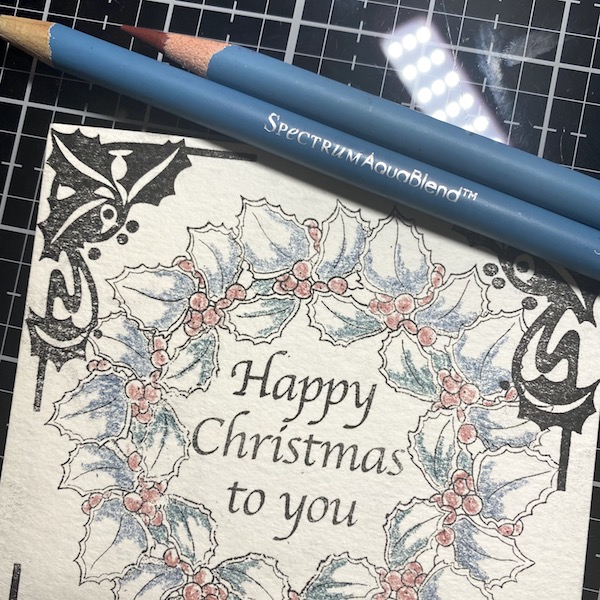
I picked a simple color palette from my spectrum AquaBlend watercolor pencils to help give me that vintage color. I colored just the areas I wanted the heaviest shadow, then using a water-brush, pulled the color across the image.

This image has an empty alt attribute; its file name is img_e1786.jpg

The berries needed more color, so I added a second layer of color to them.

This image has an empty alt attribute; its file name is img_e1788.jpg

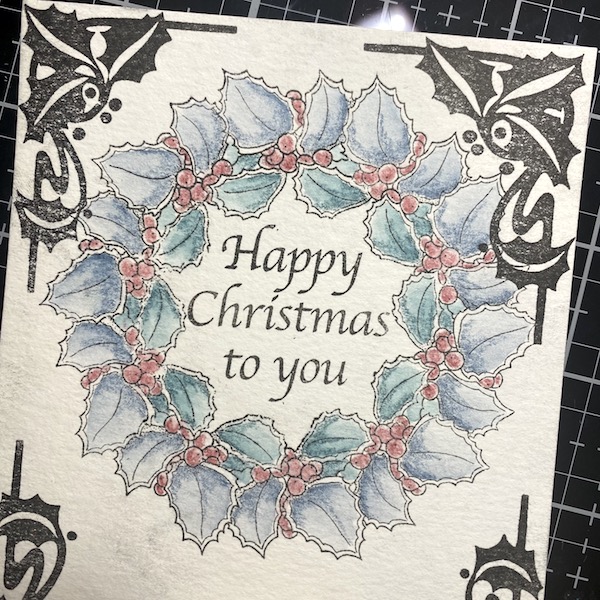
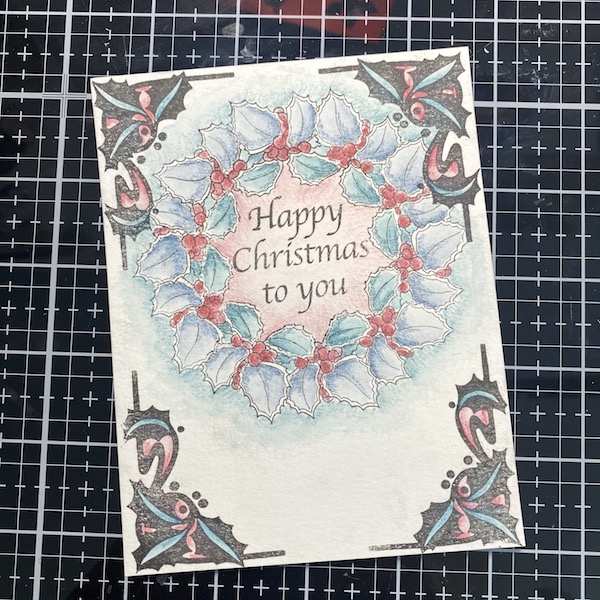
The card needed more color, so I colored in the corners and added a highlight of red to the center of the wreath.

This image has an empty alt attribute; its file name is img_e1789.jpg

Here is the final look of the coloring.

This image has an empty alt attribute; its file name is img_e1790.jpg

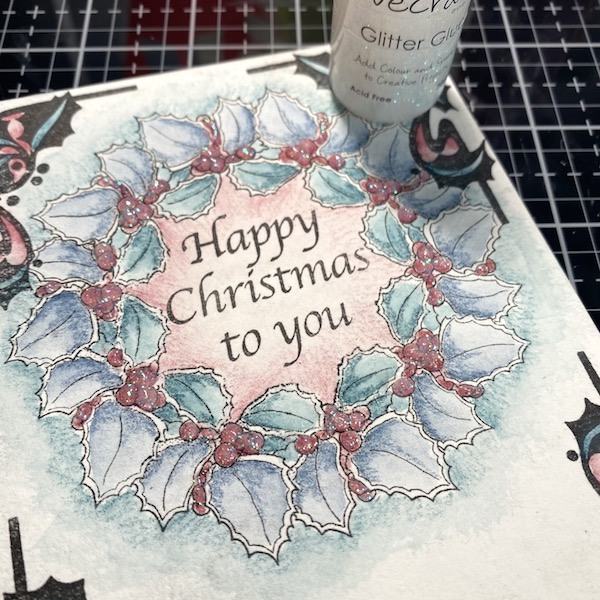
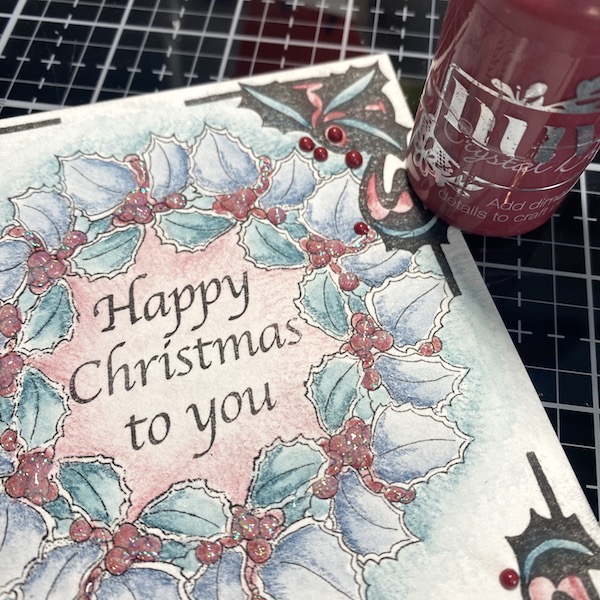
I added Dovecraft Glitter Glue to the berries.

This image has an empty alt attribute; its file name is img_e1791.jpg

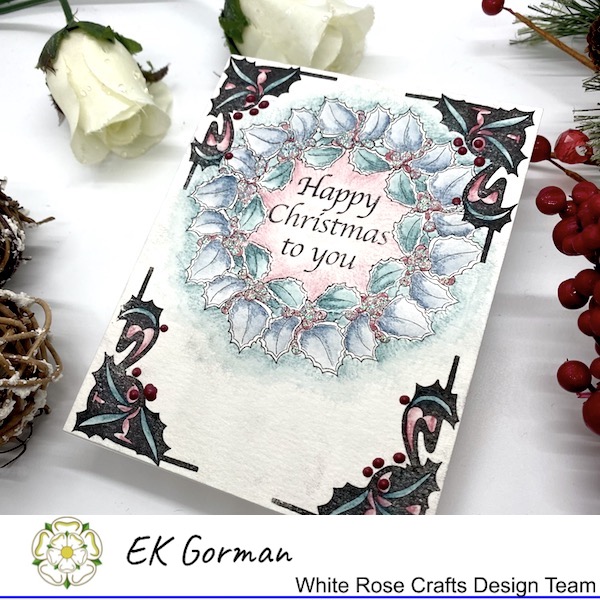
I added Autumn Red Nuvo Crystal Drops to the berries on the corners.

This image has an empty alt attribute; its file name is img_e1811.jpg

I love how this super simple card turned out. What do you think? Let me know in the comments below. Until then, happy crafting.

Friday, November 6, 2020

Fall Slimline Card

This image has an empty alt attribute; its file name is img_e1406.jpg

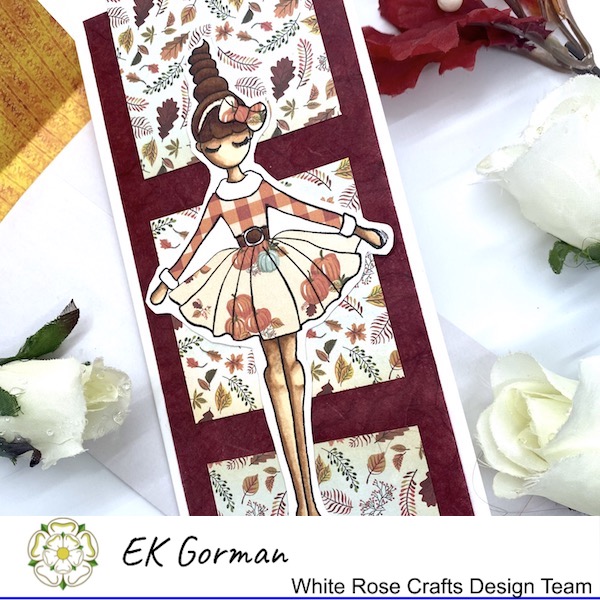
Hey Friends! It's EK popping in with a card really different for me. So I have not really been real interested in playing with the new slimline card card-making trend. For me, having to make envelopes does not always sound fun, and for a slimline card I would have to make envelopes. But today, I found a reason to make a slimline card. I love Julie Nutting stamps, but they do not fit on an A2 card, and you have to cut off a portion of the image. So it only seemed natural to venture into this new card making crazy while playing with a collection White Rose Crafts supplies.

This image has an empty alt attribute; its file name is img_e1373.jpg

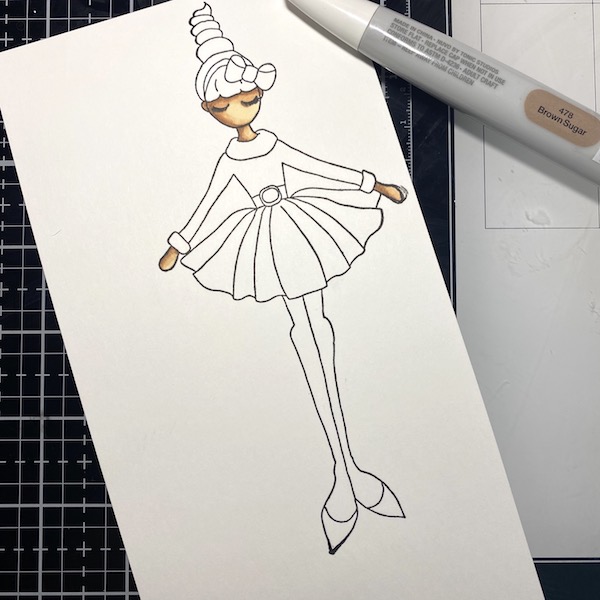
I stamped out the Julie Nutting Merry stamp onto some heavy cardstock. Then using the Nuvo Creative Pen Fair Skin Tones and Natural Browns markers to color in the skin and hair. I then fussy cut out the image.

This image has an empty alt attribute; its file name is img_e1374.jpg

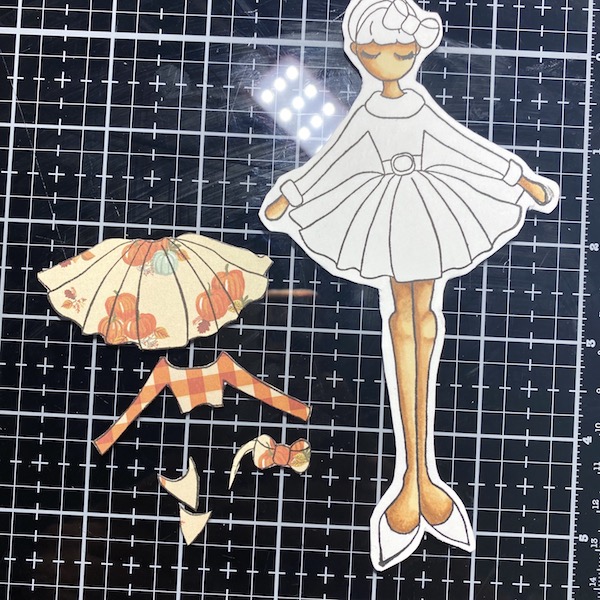
To dress the image, I stamped the clothing onto some fall inspired paper from the Carta Bella Fall Break paper pack. I fussy cut out the clothing and then rounded the edges with a black marker to clean up the cut edges.

This image has an empty alt attribute; its file name is img_e1375.jpg

Using some liquid adhesive, I dressed the image.

This image has an empty alt attribute; its file name is img_e1383.jpg

I then created the slimline card and added a trimmed piece of Mulberry Paper in Burgundy. I trimmed some more printed paper from the Fall Break paper pack to 2.5x2.5 inches and added it over the Mulberry Paper. Finally I adhered the girl on top.

This image has an empty alt attribute; its file name is img_e1382.jpg

To finish the card I stamped a fall sentiment from the Stampendous stamp set onto some white cardstock using Brushed Corduroy Distress Oxide.

This image has an empty alt attribute; its file name is img_e1407.jpg

Have you played along with the slimline cards yet? Do you make your envelopes to go along with it?

This image has an empty alt attribute; its file name is img_e1409.jpg

And do you ever paper piece your favorite stamps? Let me know in the comments below. Until then, happy crafting!

Sunday, March 1, 2020

'True Blue' Monochrome Cardmaking Kit Release

Can't get enough of our White Rose Crafts Card Making Kits....they prepare yourself because today we are releasing another fun filled monochrome kit!
The 2020 Pantone Color of the Year is "Classic Blue", and this glorious blue monochrome kit is just jam-packed with beautiful, totally on-trend goodies for you - and with a retail value of  OVER $45, it's an absolute steal!
Little Acres Creations Balloon Alphabet Stamp Set
ScrapBerry Pigment Ink - blue
12 6x6 ScrapBerry "Rhapsody in Blue" papers
12x12 sentiment sheet from Kaisercraft "Indigo Dreams" collection
Petallics Cardstock in "Blue Star" and "Pearl"
3 x Card 6"x6" frames in three shades of blue from Dovecraft
Want2Scrap Adhesive Pearls in Steel Blue
Ruby Rock-It Bella Bling - Blue Rhinestone Butterflies
Dovecraft "True Blue" ribbon pack - 4 x 1yd (approx) lengths
Dovecraft "Blue Skies" button pack - blue
Dovecraft "Blue Skies" Photo Corners - blue
Dovecraft "Blue Skies" Photo Frames - Blue

Check out design team member EK's unboxing video to see exactly what is inside!

To watch the video in HD, click here!
Make sure you stayed tuned because soon EK will be releasing a new video sharing Five Fast Cards you can make using this fun ‘blue’ kit!
Let us know in the comments below which crafting supplies you are most excited to see be used.  Until then, Happy Crafting!