Wednesday, December 9, 2020

Merry Christmas Cards featuring the A Merry Little Christmas Kit

 Hello Crafty Friends - I am here with 2 cards using the A Merry Little Christmas Kit.

Card #1 - Merry Christmas


I gathered the supplies from the kit. I have the Decoupage paper, the specialty gold cardstock, the puffy Reindeer trim and the red and green pearl stickers. From my stash I have white card base, White, Green and Red cardstock and adhesive.

I start by inserting a piece of white cardstock into my Xyron Creative Station Lite. I will use this for the decoupage paper. I adhere the decoupage paper to the white cardstock it measured 4"x51/4".

Next I adhere a strip of green cardstock to the bottom of the card panel. It measures 1"x4". I then adhere the reindeer trim on the seam of the green cardstock. Next I die cut the Merry Christmas from the Gold specialty paper and adhere it below the reindeer in the center.  I then adhere one of the red mini pearls to the nose of the first reindeer. Making him into Rudolph.
 

Now, the card is not complete!


Supplies Used:
Memory Box Die: Merry Christmas
Xyron Creative Station Lite
Recollections Brand 110# Cardstock: White
Recollections Brand 80# Cardstock: Green and Red


Card #2 Merry Christmas


I start by gathering my supplies. I stamped the Christmas tree 3 times onto white cardstock. I also trimmed the green cardstock a 1/4" smaller than my card base. I trimmed the pattern paper to 3" X 4".


I adhered the Green cardstock onto the card base. 
Then, I adhered the pattern paper onto the green cardstock. 
Next, I put a piece of Gold Glitter washi tape at the base of the pattern paper.

Next, I die cut the tree panel with the stitched rectangle. 
I stamped the sentiment and fussy cut it out.
 I foam mounted both the tree panel and sentiment to the card.

Finally, I added some Nuvo drops to the trees and snowflakes.

Now the card is complete!
Supplies Used:
Lawn Fawn Brand Die: Stitched Rectangles
Recollections Brand 110# Cardstock: White
Recollections Brand 80# Cardstock: Green and white
Recollections Brand Washi Tape: Gold Glitter

Thank you for stopping by the blog. I hope you found some inspiration!

Be sure to tag us White Rose Crafts LLC on social media 
if you create a project with products or kits purchased on the 


White Rose Crafts Design Team Member Annie Collins 
Blog: https://littlewingscreates.blogspot.com/ IG: @anniec09

It Should Be Celebrated

Welcome back! It's Esther on the White Rose Crafts blog - sharing a layout I've made from my adventures during Creativation weekend 2020. My Daugther and I were lucky enough to get to go to the Mucho Mas Art Gallery, for a make and take, and we took lots of selfies. We also made some Marabu Easy Marble ceramic hearts that I hope to scrapbook about sooner than later.

I broke out my KaiserCraft Paper Pad - Party Time that I got from White Rose Crafts and I created this 12x12 Paper Layout.

The background paper was created with KaiserCraft Background Stamps and Oxide Ink Pads.

If you missed my blog post on Creating Background go check it out, then you can buy the stamps at White Rose Crafts. I've seriously used these background stamps in every scrapbook page since I got them. They are my favorite! 

Some of my favorite KaiserCraft background stamps:

KAISERCRAFT PAPER PAD 6.5"X6.5" 40/PKG - PARTY TIME

I also buy all of my Oxide and Distress Inks from White Rose Crafts. Check out the huge selection, they actually have a bunch of inks on sale right now.

I hope I have inspired you a tiny bit. Remember to share your beautiful creations at the White Rose Crafts Gallery. 

Thank you so much for stopping by!

Thursday, December 3, 2020

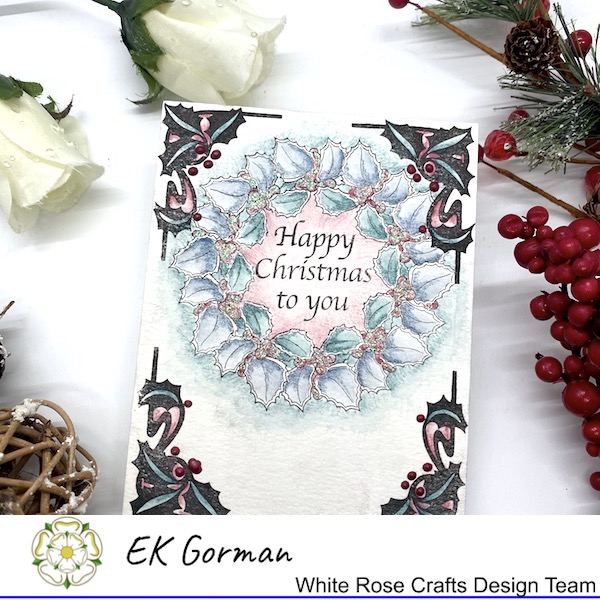
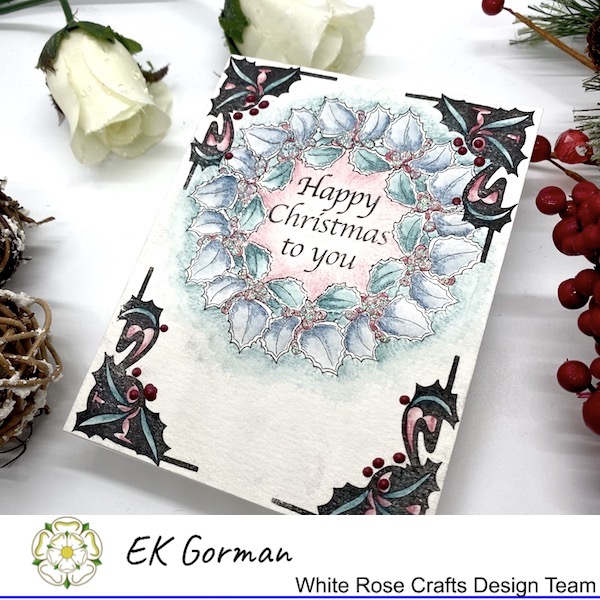
Vintage Wreath

This image has an empty alt attribute; its file name is img_e1810.jpg

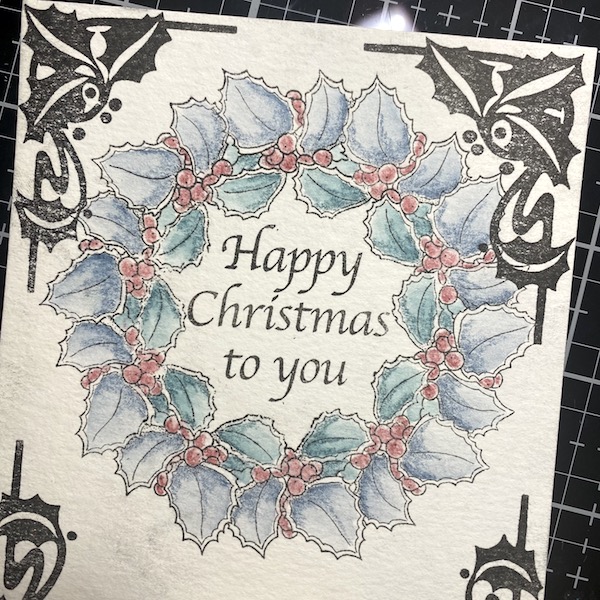
Hey Friends! It's EK and today I am playing around with a Woodware UK stamp set from White Rose Crafts today and some watercolor pencils to create a little vintage feel Christmas card.

This image has an empty alt attribute; its file name is img_e1784.jpg

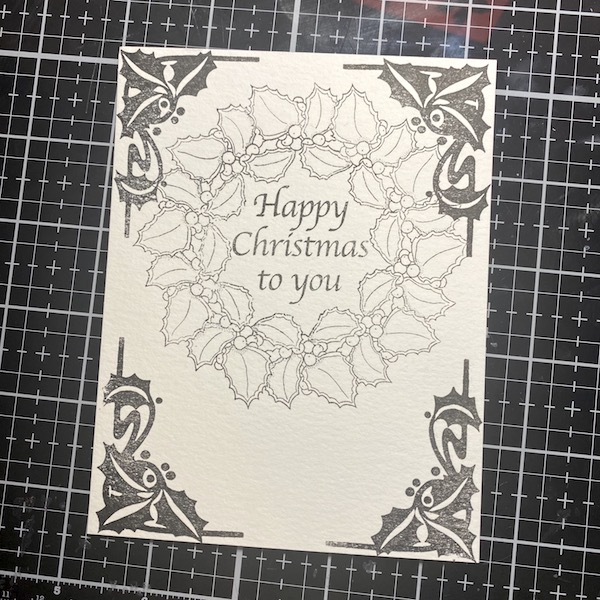
I started by stamping out the Woodware Holly Wreath stamp set onto some watercolor paper using some water resistant black ink.

This image has an empty alt attribute; its file name is img_e1785.jpg

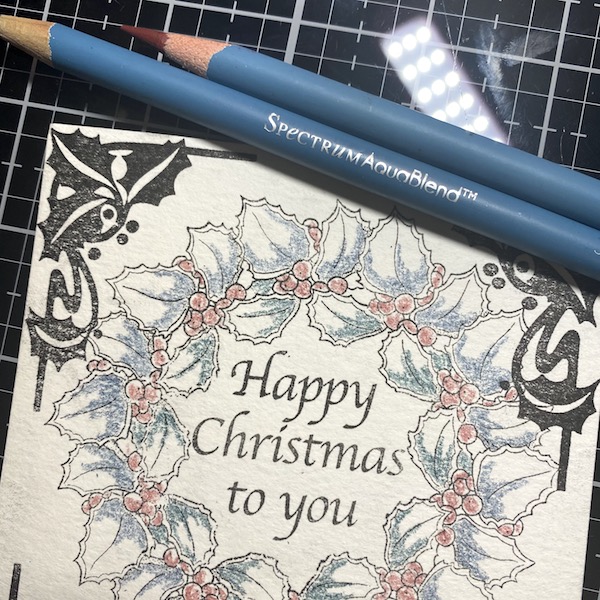
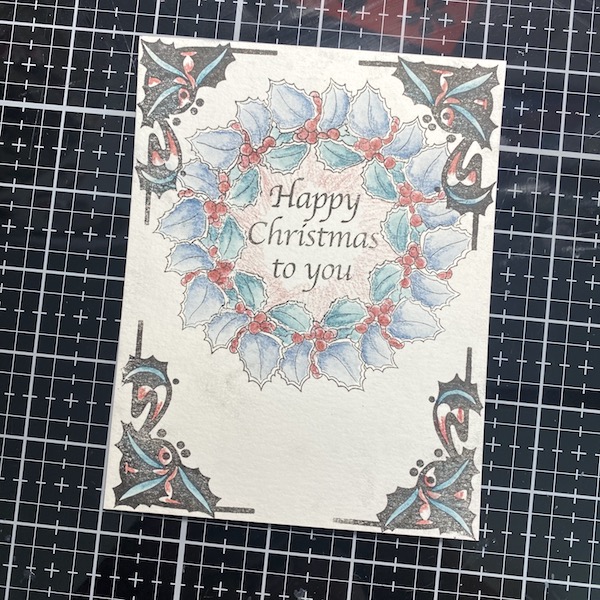
I picked a simple color palette from my spectrum AquaBlend watercolor pencils to help give me that vintage color. I colored just the areas I wanted the heaviest shadow, then using a water-brush, pulled the color across the image.

This image has an empty alt attribute; its file name is img_e1786.jpg

The berries needed more color, so I added a second layer of color to them.

This image has an empty alt attribute; its file name is img_e1788.jpg

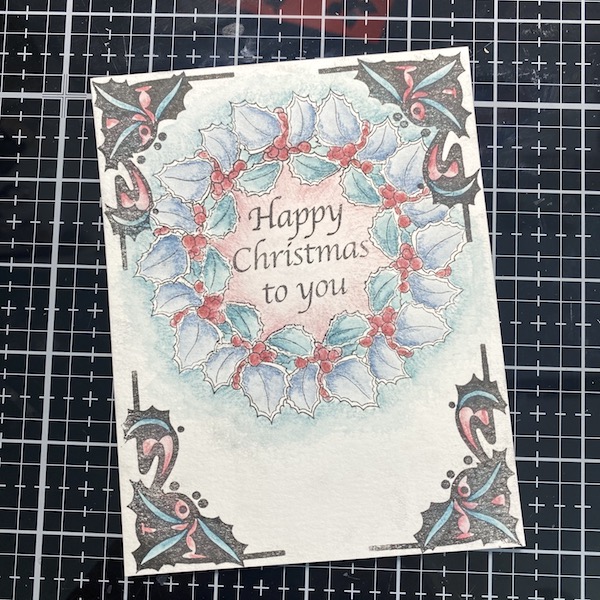
The card needed more color, so I colored in the corners and added a highlight of red to the center of the wreath.

This image has an empty alt attribute; its file name is img_e1789.jpg

Here is the final look of the coloring.

This image has an empty alt attribute; its file name is img_e1790.jpg

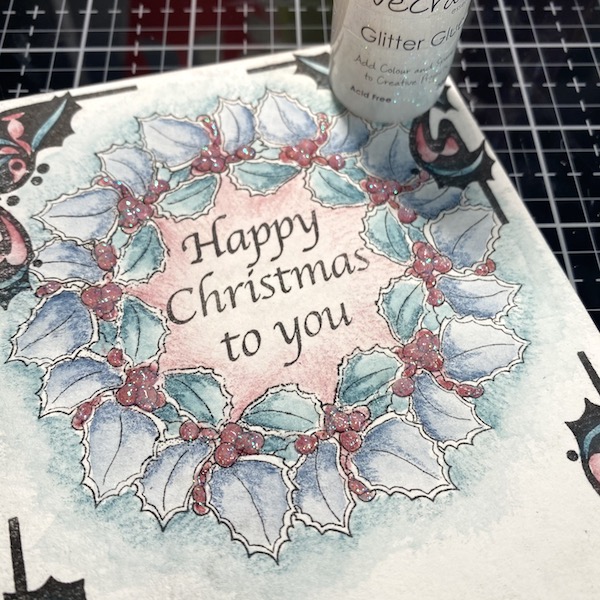
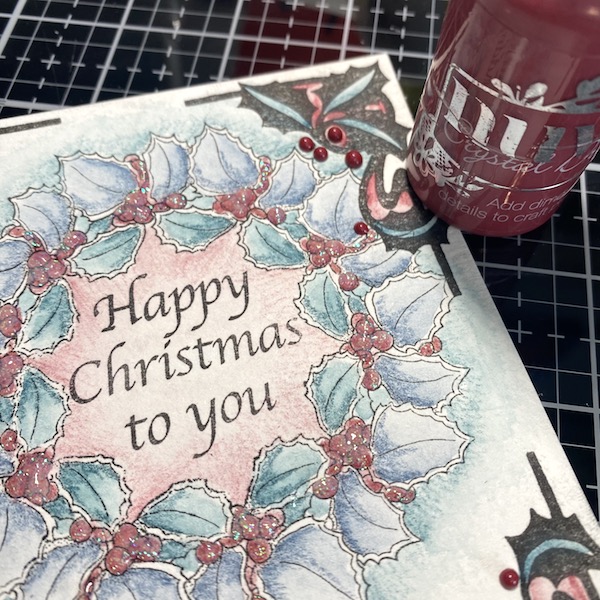
I added Dovecraft Glitter Glue to the berries.

This image has an empty alt attribute; its file name is img_e1791.jpg

I added Autumn Red Nuvo Crystal Drops to the berries on the corners.

This image has an empty alt attribute; its file name is img_e1811.jpg

I love how this super simple card turned out. What do you think? Let me know in the comments below. Until then, happy crafting.

Tuesday, December 1, 2020

You've Been Spotted


White Rose Crafts is so excited to announce a brand new initiative!  

We love seeing what you create from the White Rose Crafts shelves and how creative our customers are using our wide range of crating products.  

We love seeing what you create so much, that we are want to not only share your creations, but reward you for creating with us.

So starting now, if we spot something you have created and share it, we will be sending you more craft supplies to keep creating. 

 That's it. 
We see it, we share it, you get more craft goodies for free.

We don't care if you are a stamper, an embellisher, a paper piecer or all of the above.  We are just as excited about cards, planner layouts, scrapbook pages, or something truly unique.  We love it it all.  And we are looking to share it! 

All you have to do is simply share your creations over on the Facebook White Rose Crafts Gallery.  

We Can't Wait to Spot what You've created using the wide range of White Rose Crafts Supplies!


Monday, November 30, 2020

Go with the Flow

Hello! Alison here. Today, my White Rose Crafts post is what was supposed to be a card with AALL & Create's Sea Life stamp set, but turned out to be an art piece instead. My son was working in my craft room making a birthday card as I created this piece, and he loved it so much that he said it needed to be his. So I switched gears a little. Made it bigger, added embossing powder, etc. so that he could hang it in his room like he wanted. Needless to say I was really touched by this (the conversation was quite comical...he essentially demanded I give him the piece in the nicest way possible), and I am so glad he loves it. I hope you like it too.

I knew I wanted a Gel Press background to start with, and I found one that was mostly aqua and green, and had a lot of my "roll-off" (the excess paint from my brayer) on it, so it had only subtle patterning. I thought it was perfect for my "water." I stamped the gorgeous Whale stamp on to the monoprint and decided to color it with Copics.


I really love using teals with olive greens and magenta. I thought it would be the perfect color combination for this piece. I really love the collage feel of these stamps. It looks like you've taken a lot of time to layer images, when you really only stamped one thing. I backed the colored image with a deep blue textured cardstock, and added some Shabby Blue embossing powder from Stampendous. I applied it in such a way so that it looks like sea spray.


All in all (pun intended), this didn't take long to create, since my monoprint was already in my stash, and I didn't need to do very detailed coloring. But it looks like it took a while. AALL & Create has quickly become one of my absolute favorite brands to work with, and you can get many of their latest stamps and stencils over at the White Rose Crafts Shop. Thanks so much for stopping by. Have an inspiring day!

Thursday, November 26, 2020

Hope For Tomorrow

On this the day of Thanksgiving, the whole White Rose Crafts family wants to take a moment and thank everyone who pops in here regularly to support this little online crafting shop. We know this past year has been really strange and for many difficult. So instead of spouting all that we are thankful for today, we thought instead we would wish you Strength for today, and Hope for tomorrow.

I tried something really out of my comfort zone toady, and pulled a whole host of papers out from different paper packs from White Rose Crafts. The woodgrain paper comes from the LemonCraft House of Roses 12x12 paper pack. The brown doted and blue plaid paper both come from Craft O'Clock Ladies and Gentleman paper pack. Finally I pulled the script paper from the Wild Rose Studio Antique Library.

Each piece of paper got a blending of Ground Espresso Distress Oxide around the edges so they felt more like papers from the same collection.

I stamped out a sweet little hedgehog from the Craft Consortium Over the Hedgehog stamp set. I stamped the image in Ground Espresso Distress Oxide and then watercolored it using the same ink and Brushed Corduroy. I then fussy cut out the image.

On a scrap piece of watercolor paper, I stamped out what I think might be the perfect sentiment for this year from the Kaisercraft Sympathy Words stamp set. I stamped the sentiment in Brushed Corduroy Distress Oxide and edged the paper in Ground Espresso.

Using different levels of three dimenstional adhesive, I layered the hedgehog and ephemera from the Craft O'clock Ladies and Gentleman Ephemera Collection. The die cuts got a brush of Ground Espresso Distress Oxide to help blend it in with the rest of the paper.

Finally I tucked in a bunch of buttons and adhesives to finish the card. I used American Craft Faceted Brushed Metallic Gold adhesive gems, DoveCrafts Blue Skies buttons, and Want2Scrap Steel Blue adhesive pearls.

We pray everyone is Thankful for something this year. The whole design team family of at White Rose Crafts is thankful for you. Let me know in the comments below what you are thankful for, or at least what you hope for tomorrow.

Until then, may crafting make you happy.

Thursday, November 19, 2020

A new Story Begins

This image has an empty alt attribute; its file name is img_e1629.jpg

So in the madness of 2020, many online stores found themselves caught inside a dilemma. Do you keep your customers safe and close your doors, or do you solider on? One company that found itself closing its doors for over six months was White Rose Crafts. This is a small company whose owner, Kay, (who is English but lives in the USA) found herself trapped over seas and unable to get home.

Well, it has been a long hard road, but White Rose Crafts doors are back open. If you are unfamiliar with this online shop, it specializes in paper crafts with an international flair. There are all kinds of papers, stamps, dies, stickers, and so much more from all over the world that you just don't always find state side.

This image has an empty alt attribute; its file name is img_e1630.jpg

I felt it was only fitting today, as I create a new project for WRC, that we focus on new beginnings, since reopening the store is in all intensive purposes a new beginning for White Rose Crafts.

This image has an empty alt attribute; its file name is img_e1617.jpg

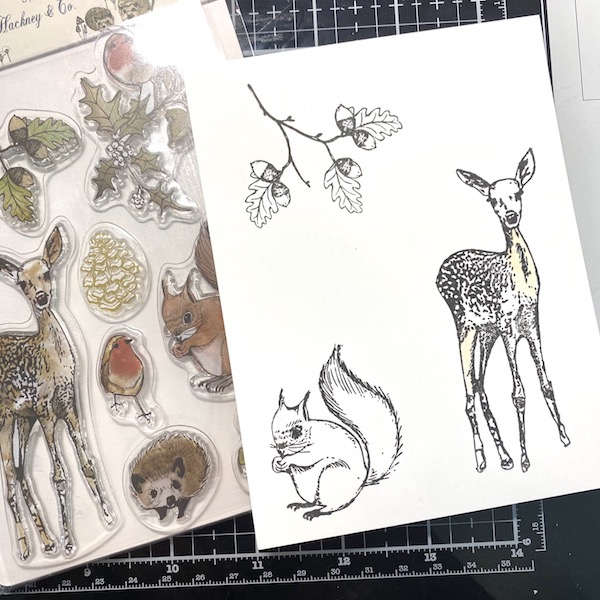
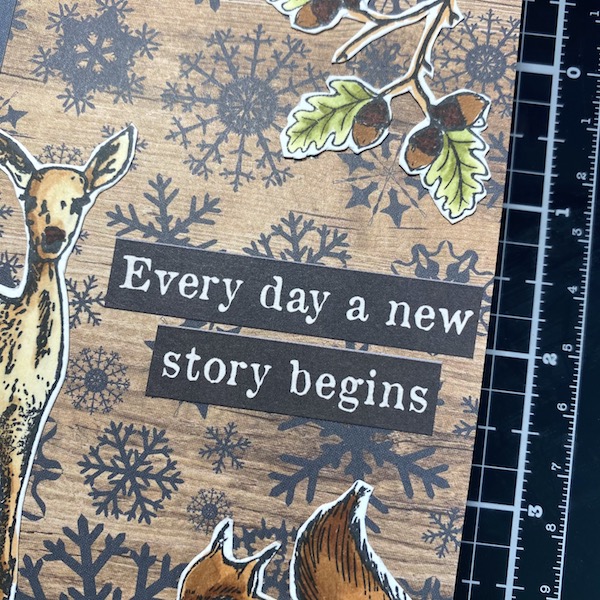
I started by stamping three images from the Consortium Craft (England) Winter Woodland stamp set onto some white card stock.

This image has an empty alt attribute; its file name is img_e1619.jpg

Using Nuvo Creative Pens, I colored the images and fussy cut them out. I used the Organic Greens, Natural Browns, and Fair Skin Tones.

This image has an empty alt attribute; its file name is img_e1618.jpg

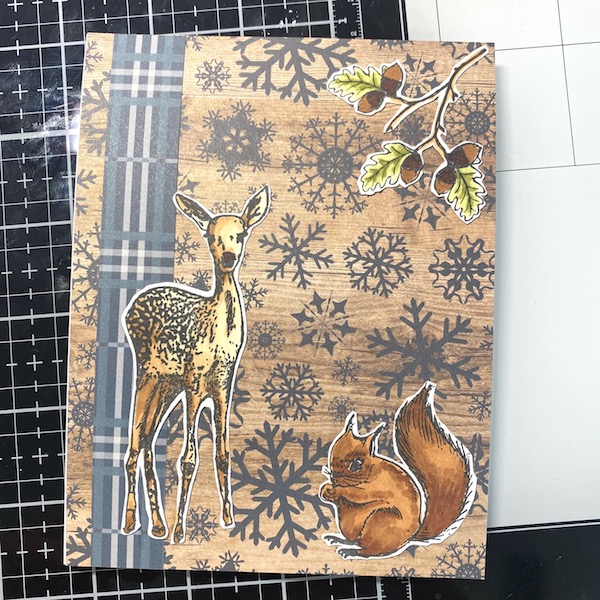
I trimmed up a piece of two sided printed paper from the Carta Bella Let it Snow paper pack. I trimmed the snowflake side of the paper to 4.25x5.5 inches and trimmed the blue plaid side to .75x5.5 inches. I adhered the paper to an A2 card frame.

This image has an empty alt attribute; its file name is img_e1626.jpg

Using a liquid adhesive adhere the fussy cut stamp images onto the card frame.

This image has an empty alt attribute; its file name is img_e1627.jpg

I finally added a sentiment from the Kaisercraft (Austrilla) Romantique Sticker Sheet.

This image has an empty alt attribute; its file name is img_e1631.jpg

Make sure you pop on over to White Rose Crafts and share some love with the store being back open again!.

Tuesday, November 10, 2020

Thinking of You

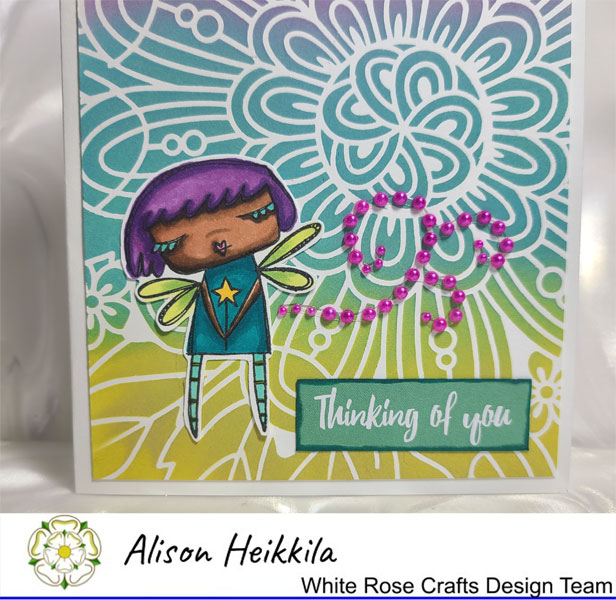
Greetings! Alison here. I am a big fan of AALL & Create, and I am so happy that White Rose Crafts has been carrying their products for some time. And, they just received some of the newest collection...some of which is on it's way to me right at this very moment! So for today's post, I have a couple of (slightly) older products, including the Lil' Magic stamp.

I knew I wanted to use this sweet fairy again. I used her recently on a card HERE. So I colored her up with Copics and fussy cut her. My background was made with the gorgeous Abundance stencil from AALL & Create and was inked up with Dusty Concord, Broken China, and Crushed Olive Distress Oxide. I really love this color combination.

My sentiment is from Kaisercraft's Bombay Sunset paper pad. There are lots of great perforated sentiments in the back of the pad, and I have used them on several cards. I added some color on the edge with a Copic...I think it was Duck Blue. For a little shine, I used a Pearl Swirl from ScrapBerry.

This is another fast, easy to replicate card. Ink Blending is a pretty fast process, and the fairy doesn't take long to color at all. Wouldn't this make a fun Christmas card, just by changing the color palette. Please be sure to visit the White Rose Crafts Gallery on Facebook, and the White Rose Crafts Shop to see all of the newest products. Thanks so much for stopping by. Have an inspiring day!

Friday, November 6, 2020

Fall Slimline Card

This image has an empty alt attribute; its file name is img_e1406.jpg

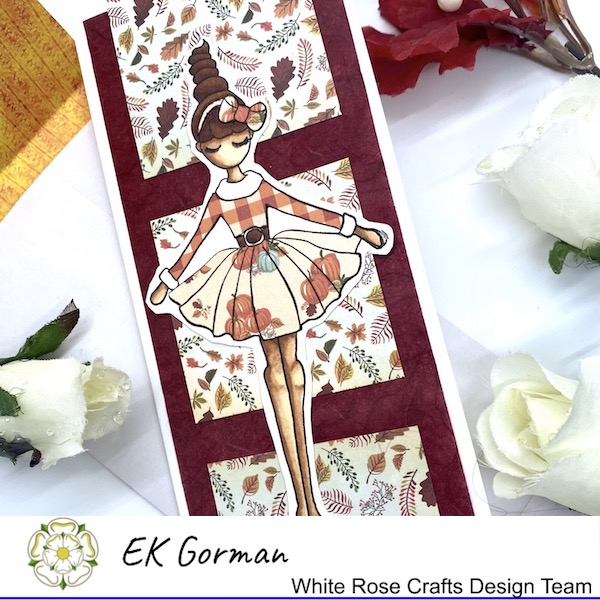
Hey Friends! It's EK popping in with a card really different for me. So I have not really been real interested in playing with the new slimline card card-making trend. For me, having to make envelopes does not always sound fun, and for a slimline card I would have to make envelopes. But today, I found a reason to make a slimline card. I love Julie Nutting stamps, but they do not fit on an A2 card, and you have to cut off a portion of the image. So it only seemed natural to venture into this new card making crazy while playing with a collection White Rose Crafts supplies.

This image has an empty alt attribute; its file name is img_e1373.jpg

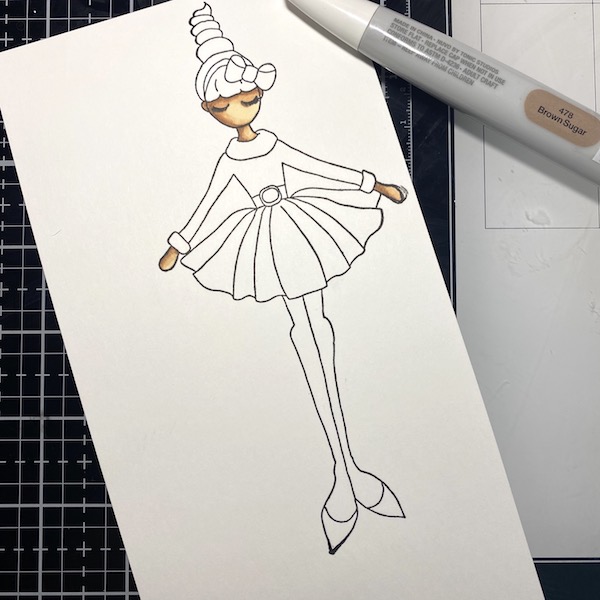
I stamped out the Julie Nutting Merry stamp onto some heavy cardstock. Then using the Nuvo Creative Pen Fair Skin Tones and Natural Browns markers to color in the skin and hair. I then fussy cut out the image.

This image has an empty alt attribute; its file name is img_e1374.jpg

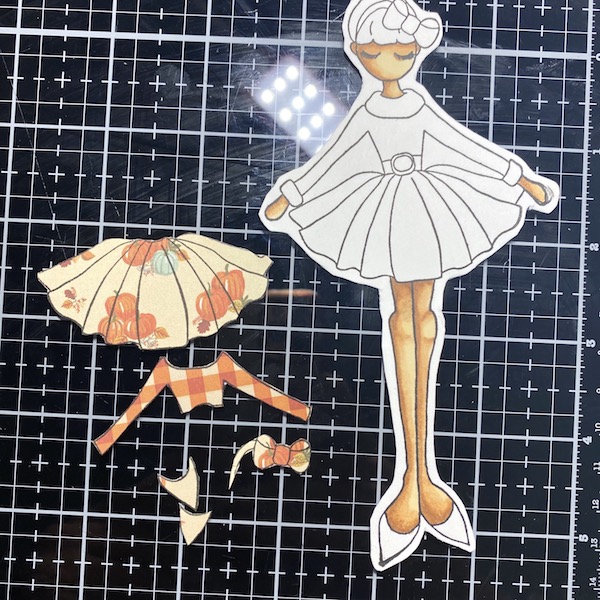
To dress the image, I stamped the clothing onto some fall inspired paper from the Carta Bella Fall Break paper pack. I fussy cut out the clothing and then rounded the edges with a black marker to clean up the cut edges.

This image has an empty alt attribute; its file name is img_e1375.jpg

Using some liquid adhesive, I dressed the image.

This image has an empty alt attribute; its file name is img_e1383.jpg

I then created the slimline card and added a trimmed piece of Mulberry Paper in Burgundy. I trimmed some more printed paper from the Fall Break paper pack to 2.5x2.5 inches and added it over the Mulberry Paper. Finally I adhered the girl on top.

This image has an empty alt attribute; its file name is img_e1382.jpg

To finish the card I stamped a fall sentiment from the Stampendous stamp set onto some white cardstock using Brushed Corduroy Distress Oxide.

This image has an empty alt attribute; its file name is img_e1407.jpg

Have you played along with the slimline cards yet? Do you make your envelopes to go along with it?

This image has an empty alt attribute; its file name is img_e1409.jpg

And do you ever paper piece your favorite stamps? Let me know in the comments below. Until then, happy crafting!